Pages

Showing posts with label lemon. Show all posts

3.16.2013

Dip It Low...

In the past, I have discussed how I have recently come to terms with being an extrovert, meaning that I draw energy from being around others, and do not enjoy being alone. This is why, though the rational half of my brain understands that it is good for Justin's career to pick up extra shifts on the weekends at a public library and keep up-to-date experience in that field on his résumé, I do not relish the fact that he takes the car with him and leaves me alone all day on the weekends.

To keep myself distracted and cut down on the feelings of despondency and boredom that accompany solitude for me, I try to stay as busy as possible on the unfortunate Saturdays when Justin is working,and I usually treat these days as an opportunity to scratch chores off my to-do list, catch up on the multitude of television shows that I TiVo but don't have time for during the week, and to tackle involved projects in the kitchen.

This week, however, our house was already relatively clean, we had leftovers we needed to eat, including enough leftover ice cream pie to make baking a wasteful option, and enough shows were on reruns that I had nothing to watch. I managed to talk Dad into having lunch with me as a pitstop on his way back to the burbs after picking up some papers downtown, but I was still desperate for something to keep my mind occupied.

Naturally, I turned once more to my Pinterest board, where I spotted a bean dip I could make using ingredients I already had on hand, including some of the rosemary leftover from last night's ditalini with chickpeas that wasn't going to stay good forever. Plus, given Justin's fondness for legumes, I figured I couldn't go wrong.

I ended up with only two complaints about this recipe: first, it was so quick and easy to make that it hardly helped me kill anytime at all, and second, it didn't make nearly enough dip. It was so good, that once Justin arrived home from work with the bag of pita chips I'd asked him to pick up, we polished off the dip much too quickly.

In the future, I would double this recipe if I were making it for just the two of us, and maybe even triple it if we were entertaining guests. (I've changed the recipe below to reflect this.) Lately, we've been making our quickly-becoming-legendary spicy Moroccan carrot dip whenever we have people over, but it will be nice to have something simpler in our arsenal, as that recipe is rather labor-intensive, even if people do love it.

I actually prefer this new bean dip, as the flavor profile is more in line with my palate. I'm glad we gave it a try, and I look forward to using it as a disposal mechanism for more leftover rosemary in our future.


Rosemary Lemon White Bean Dip
adapted from Serious Eats

2 15.5 oz cans cannellini beans, drained and rinsed
4 medium cloves garlic, peeled
1 tablespoon plus 1 teaspoon freshly squeezed lemon juice and 2 teaspoons finely grated lemon zest from 1 lemon
1/2 c. extra virgin olive oil
1 tablespoons plus 1 teaspoon finely minced fresh rosemary
Kosher salt and freshly ground black pepper

1. Place beans, garlic, and lemon juice in the workbowl of a food processor fitted with a steel blade. Pulse until beans are roughly chopped.
2. With motor running, slowly pour 1/2 cup of oil through feed tube. Process until mixture is smooth.
3. Transfer bean mixture to a small bowl. Stir in rosemary and lemon zest. Season with salt and pepper to taste. Serve immediately or store in an airtight container in the refrigerator for up to 3 days.

2.22.2013

You've Got A Friend In Me...

I am not a person who needs an excuse to bake; I will bake when I am feeling bored, when I need an outlet for stress, or just because. Having a purpose behind my hobby can make for a nice change of pace though. There is something to be said for the unique satisfaction that comes from baking a cake for someone's birthday, for example, or to wow some dinner guests. Hence, it should come as no surprise that when Jess asked for my help in making a lemon meringue pie for her mother's birthday, I enthusiastically volunteered my services.

Evidently, lemon meringue pie is Jess' mom's favorite dessert, and Jess had never made one, so she turned to me because I have more baking experience. I didn't let the fact that I've never made a lemon meringue pie stop me from offering to help, since I'm always looking to expand my culinary skill set. Besides, I'd made lemon curd before, for the masterpiece of a birthday cake I made for Justin's birthday back in 2011, I've had a few experiences with making meringue, and I've perfected the art of pie crust. How hard could it be to fuse all three elements? Plus, I don't even like lemon meringue pie, so giving Jess a hand would give me the opportunity to try out a recipe I wouldn't have experimented with otherwise.

Initially, I had planned to have Jess over to bake a practice pie, and then send her off on her own to make the actual birthday pie. The more I thought about it, however, I realized that Jess wouldn't have the proper tools in her kitchen to replicate the recipe in her own kitchen. Friends don't let friends hand whip egg whites to stiff peaks for a meringue, so I decided to cut out the extra step and just invite her over to make the final pie together.

For the crust, I turned to my trusted Cook's Illustrated recipe, and luckily for me, I found a pie crust all ready to go in my freezer, so I didn't even have to make a new one. (This whole freezer inventory thing is really paying off!) For the rest of the pie, I turned to Alton Brown, after happening to catch an rerun of Good Eats recently on the subject of lemon meringue pie. It seemed like a good enough starting point, so I opted not to look further.

With a sous chef in the kitchen, making the pie went much faster than I would have expected. Jess was in charge of juicing the lemons and carefully whisking together the water, corn starch, and sugar base for the lemon curd so as not to create lumps. I rolled out the pie crust and transfered it to the pan, and worked on separating all the eggs. Since I have more experience with making custards from all those ice creams I've tried over the years, I handled the tempering of the egg yolks, but then moved over to monitor the meringue while Jess took over the lemon curd. All in all, I was shocked by how quickly it all came together, and how simple everything felt, but that could just be the effect of the confidence I've built in my skills over the years.

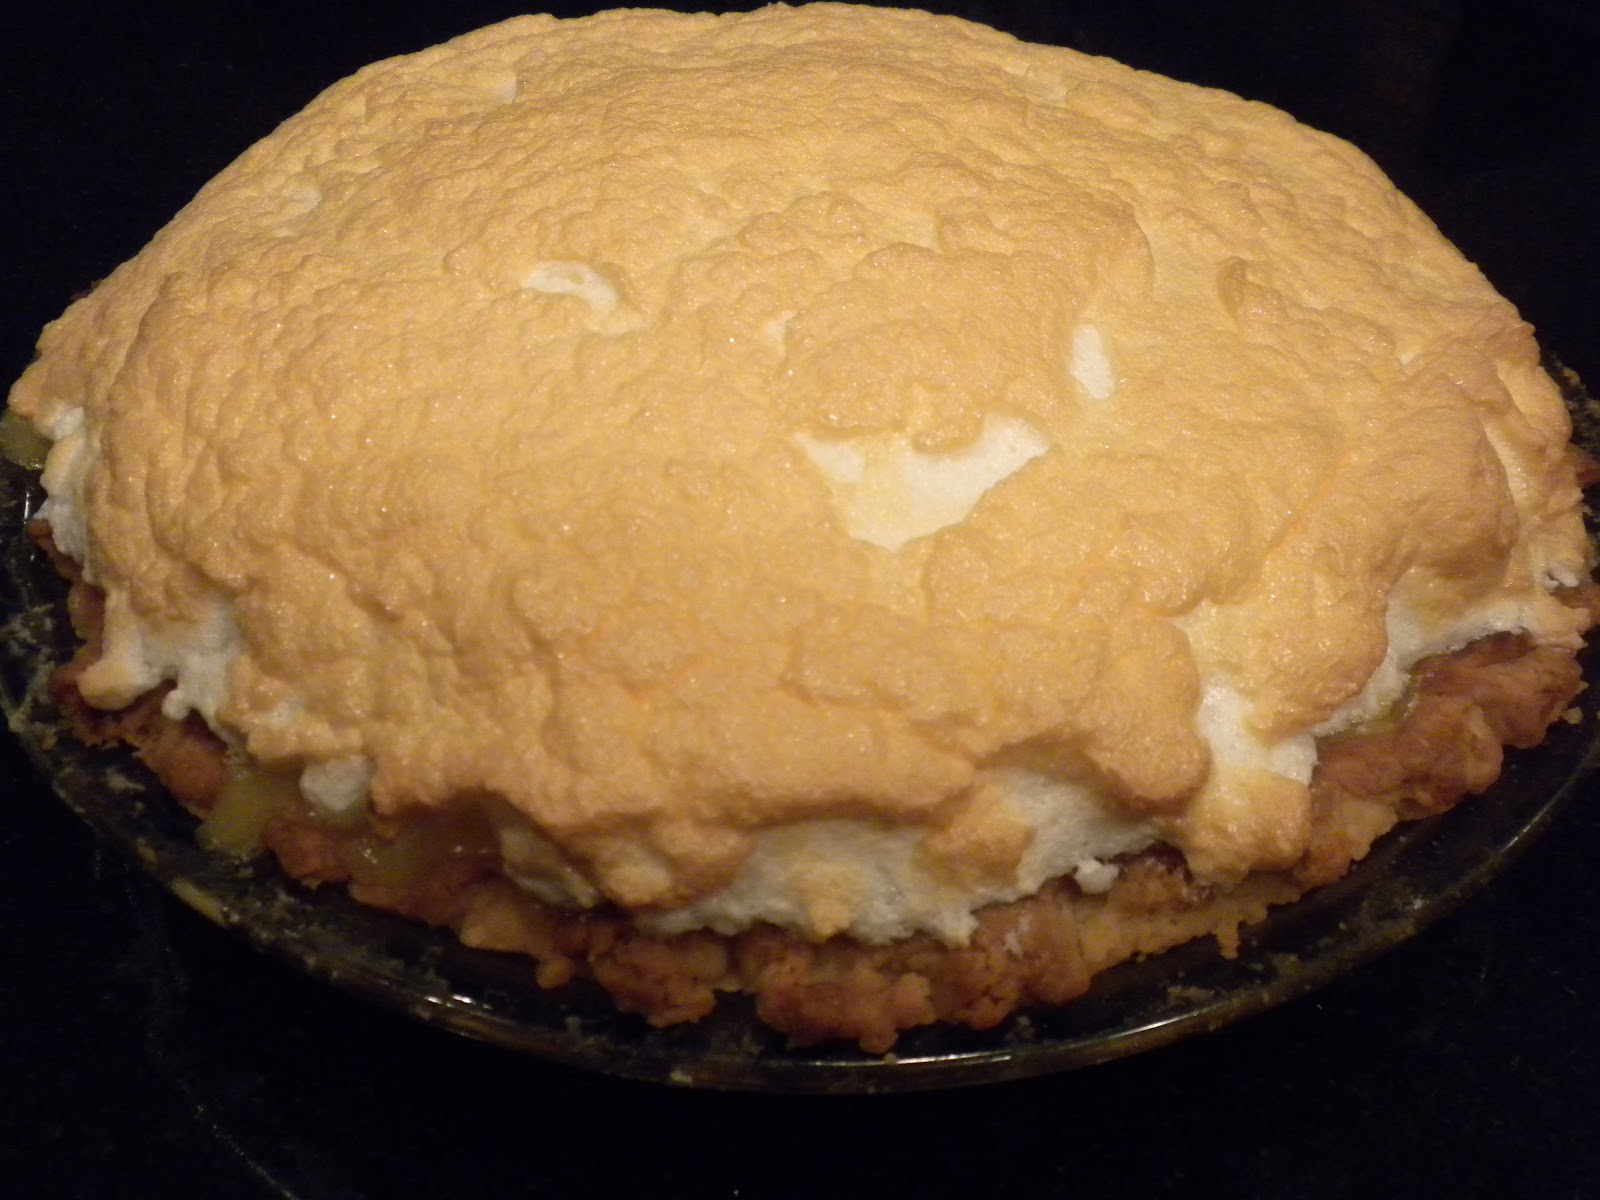
I did have trouble getting the meringue on top of the pie, as the instructions said to do it while the lemon curd was still warm, and it would ooze out of the crust with the slightest application of pressure. As a result, I couldn't get the topping to create the lovely swoops and swirls that one typically associates with the dish, but Jess reassured me, promising that, "If it looked too perfect, no one would believe that I helped!"


The pie was perfectly golden brown when it emerged from the oven, but it was still very wobbly. I was very concerned about how Jess would manage getting it home, especially since she had taken the bus to us instead of driving. She promised to take a cab home, but I was still very leery. I really should have just asked Justin to drive her home (I don't drive in the dark unless it's an emergency because I don't see well at night), but our car was covered in snow, and I didn't want to volunteer him to go clean it off unless it was his idea.

In the end, my anxiety proved to be well-founded: I got a text from Jess after she got home, saying that the lemon curd had leaked all over the taxi seat, and continued to drip as she walked the short distance to her building. The meringue was intact, but she had lost quite a bit of the filling. I was a little crushed that the pie wasn't perfect for Jess' mom, but hopefully it will still taste fine, and she will be touched by all the effort Jess went through to make it for her.

Even though I didn't get to eat any of it (and wouldn't have wanted to anyway), I still had a great time baking with Jess and helping her surprise her mom. Hopefully, she learned a few things as well that she'll be able to put into practice in her own baking endeavors. Truth be told, however, she is more than welcome to come be my pastry apprentice any day!


Lemon Meringue Pie
adapted from Alton Brown

Lemon Filling:

4 egg yolks (reserve whites for meringue)
1/3 cup cornstarch
1 1/2 cups water
1 1/3 cups sugar
1/4 teaspoon salt
3 tablespoons butter
1/2 cup lemon juice
1 tablespoon finely grated lemon zest
1 (9-inch) pre-baked pie shell
1 recipe Meringue, recipe follows

Preheat oven to 375.

Whisk egg yolks in medium size mixing bowl and set aside.

In a medium saucepan, combine cornstarch, water, sugar, and salt. Whisk to combine. Turn heat on medium and, stirring frequently, bring mixture to a boil. Boil for 1 minute. Remove from heat and gradually, 1 whisk-full at a time, add hot mixture to egg yolks and stir until you have added at least half of the mixture.

Return egg mixture to saucepan, turn heat down to low and cook, stirring constantly, for 1 more minute. Remove from heat and gently stir in butter, lemon juice, and zest until well combined. Pour mixture into pie shell and top with meringue while filling is still hot. Make sure meringue completely covers filling and that it goes right up to the edge of the crust. Bake for 10 to 12 minutes or until meringue is golden. Remove from oven and cool on a wire rack. Make sure pie is cooled completely before slicing.

Meringue Topping:

4 egg whites
1 pinch cream of tartar
2 tablespoons sugar

Place egg whites and cream of tartar in the bowl of a stand mixer fitted with the whisk attachment. Beat egg whites until soft peaks form and then gradually add sugar and continue beating until stiff peaks form, approximately 1 to 2 minutes. Use to top lemon filling.

8.20.2012

Lemon Head...

Now that we are headed into the back stretch of August, fall is coming up just around the corner. For us, that means that our days for grilling are numbered, so it is time to squeeze in a few more weeknight cookouts before it gets too chilly to cook outdoors. Considering that I didn't really enjoy grilled food when we bought our Weber two months ago, it's surprising how well I've taken to it. I think it helps to be in control of the grilling process, so that the food gets a nice smoky flavor without becoming charred and blackened, like so much grilled food seems to be.

My Pinterest board has filled up with recipes for the grill that I never thought I'd be drawn to, but for tonight, I opted for a citrus and rosemary flavored chicken dish, because there was a good deal on lemons at the grocery store this week.Though I've never been a fan of regular lemon chicken, or lemon in general, I thought that this dish might be a better option because it tempered the tartness of lemon with the addition of orange juice.

I turned out to be partially correct. While the orange blunted the sourness of the lemon, and added a pleasant complexity to the dish, the predominant flavor was still lemon. Still, it was different enough that I really rather enjoyed the meal. The thought of cooking and reducing the leftover marinade into a sauce was rather unnerving for me, as I was paranoid about all the bacteria from the raw chicken, despite the fact that I was to boil it for an extended period of time. Neither Justin or I have food poisoning yet, but it's hard to ignore all the years of food safety indoctrination telling one to dispose of anything that has touched raw chicken.

This meal will definitely be gracing our table again when grilling season rolls around once more, but with one exception. The original recipe called for grilling up two sliced oranges and two sliced lemons, with the intent of squeezing them over the chicken at mealtime. While the gently charred citrus wedges looked beautiful on the platter, the chicken already had a sauce, and squeezing more citrus over it was overkill that doused the plate and made everything else on it soggy. We ended up not using them beyond the first portion, and now we've got a ton of leftover grilled citrus for which we have no other use. I hate wasting food, so I'm going to omit that step in the future unless I want to wow some house guests with an impressive and beautiful food display.


Grilled Citrus Chicken Breasts
adapted from Bon Appétit

2 tablespoons extra-virgin olive oil plus more for brushing
1 cup fresh orange juice
1/2 cup fresh lemon juice
4 garlic cloves, minced
2 teaspoons minced fresh rosemary
2 teaspoons kosher salt plus more for seasoning
2 1/2–3 pounds boneless, skinless chicken breasts, pounded gently to even thickness


Whisk 2 tablespoons oil and next 4 ingredients in a large bowl; stir in 2 teaspoons salt. Add chicken breasts; turn chicken to coat, cover, and chill overnight.

Build a medium-low fire in a charcoal grill, or heat a gas grill to medium. Remove chicken breasts from marinade; set marinade aside. Place chicken breasts on grill. Cover and grill, moving chicken to different spots on the rack for even cooking but without turning, until slightly charred and cooked through, about 165 degrees.


Meanwhile, bring marinade to a boil in a small saucepan and cook until reduced to glaze consistency (about 1/3 cup); season with salt. Transfer chicken to a platter and spoon glaze over chicken.

2.04.2012

Strange Fruit...

I'm always on the lookout for different and unusual recipes for my baking projects. Even if it's not particularly something I'm interested in eating, I'll make something for the novelty value of the recipe, or the chance to try my hand at a new skill. If I made things solely because I was craving them, my baking repertoire would be much smaller, and I would gain approximately a million pounds. Things are better this way.

So when I stumbled across a recipe for a Shaker lemon pie made with Meyer lemons, I was intrigued on three fronts: A) I've never had a Meyer lemon, since they're rare and their growing season is short; B) Justin likes lemon desserts even if I don't (recall, if you will, his birthday cake last October); and C) I'd never heard of a Shaker lemon pie, and I was fascinated by the idea of putting whole sliced lemons into a pie, instead of a lemon curd-like filling. The Shakers, who believed in thrift and not wasting anything, developed this pie recipe to utilize all parts of the lemon. I wasn't sure if such a thing would work, but when I mentioned this crazy new recipe I'd found to my coworker Lydia, who also enjoys baking, she ensured me that Shaker lemon pies are indeed delicious, and that her family has been making them for years. Based on her recommendation, I decided to give it a go.

I managed to track down some Meyer lemons at Whole Foods, as my local grocery store, unsurprisingly, didn't carry them. Meyer lemons are believed to be a hybrid of regular lemons and mandarin oranges, giving them a sweeter, more floral flavor than a regular lemon, as well as a thinner, more orange-colored skin. They became popular in the U.S. in the early 20th century, but nearly all existing plants were destroyed in the 1940s when they were discovered to be asymptomatic carriers of a disease that threatened to wipe out the entire American citrus crop. After years of experimenting, scientists finally developed a safe variety for cultivation, but they're still rare compared to regular lemons. 

With my exotic citrus in tow, and all of my kitchen supplies recently unpacked, I was all set to conquer my first baking project in my new kitchen. Aside from not reading the recipe very carefully, which resulted in some unfortunate timing issues (like preparing and chilling the crust, only to learn that the lemons for the filling had to macerate for two additional hours), the recipe was as simple to make as had been promised to me. I experimented with the much-lauded Cook's Illustrated pie crust recipe, which I had attempted to make last time, and I am pleased to report that it was my best pie crust to date. It was flaky, buttery perfection, and it even looked the best, because I finally borrowed a standard-size pie plate from my mom after figuring out that I never had enough overhang to make a decorative edge on my pies because my pie plate was one inch larger than average. 


Unfortunately, it turned out that my heavenly crust encased one of the most awful products to ever exit my kitchen. Seriously, this pie was foul. It tasted like nothing but bitter lemon rinds to me. Even Justin, lover of all things lemon, could only muster the following praise: "The crust is really good." At least he ate his whole piece, whereas I took about two bites of the filling before scraping the rest out and eating the crust plain. I invited Lisa over to try it, since she's the other great lemon-lover in my life, for a third opinion, and while she seemed to like it better than either Justin or I, she agreed with my assessment that it would probably have been better if I had zested the lemons, removed the pith, then used the interior of the fruits.

Shortly after she left, we pried the top crust off the pie, and put the rest of it down the garbage disposal. It was that bad. I didn't even want to take the leftovers to work to dispose of them, as I didn't want that disaster sullying my baking reputation around the office. Nobody is perfect, but this was probably the worst dessert I've ever made. At least I can take solace in the fact that I've now found a winning pie crust recipe, and I can stop experimenting on that front, but memories of this miserable lemon pie will haunt my dreams. I won't bother giving you the recipe, as I firmly believe it should die a fiery death, but I will share the recipe I used for the crust, because it was the only good thing to come out of this tragedy. Just be sure to use it with a better filling, okay?


Foolproof Pie Dough
adapted from Cook's Illustrated

12.5 oz. unbleached all-purpose flour
1 teaspoon table salt
2 tablespoons sugar
12 tablespoons (1 1/2 sticks) very cold unsalted butter, cut into 1/4 cubes
1/4 c. very cold shortening, cut into 4 pieces
1/4 c. very cold lard, cut into 4 pieces
1/4 c. very cold vodka
1/4 c. very cold water

1. Combine flour, salt, and sugar in a food processor, and pulse to combine. Sprinkle the butter, shortening, and lard evenly over the flour mixture, and process until fats are in pea-size chunks, four to seven pulses. Empty mixture into a medium-size bowl.
2. Sprinkle water and vodka over mixture. With a rubber spatula, use a folding motion to mix, pressing down on the dough, until dough is slightly tacky and sticks together. Divide dough into two even balls and flatten into 4-inch disks. Wrap each disk in plastic wrap and refrigerate at least an hour before using.

10.07.2011

Happy Birthday To Justin...

Today marks the beginning of Justin's last year in his 20s. Practically ancient, right?

The past year has been exceptionally busy for my beloved. In the span of 365 days, he traveled out of state several times, weathered a bout of pneumonia, got four jobs, made new friends, went new places, tried new foods, learned new skills, and (most importantly, in my opinion) met and fell in love with me. Suffice it to say, he's had a lot on his plate since last October.

That's why I decided to celebrate him and usher him into what will hopefully be an equally happy new year on the planet with a birthday cake befitting the epic year he just had. I spotted his cake a few months ago, when an aimless stroll through the cookbook section of the Harold Washington Library left me sitting up in bed one night with a copy of Rose's Heavenly Cakes by baking guru Rose Levy Beranbaum. It takes gumption to name your second book The Cake Bible, but it seems, at least within the baking blogosphere, that Beranbaum does indeed have a sacrosanct reputation as the authority on cake baking. Even though I don't bake many cakes myself, I was curious as to what all the fuss was about, so I grabbed a copy of one of her books and paged through it.

For the large part, the recipes contained therein were too intimidating to even consider trifling with, and basically reaffirmed my desire to stay within my cookie comfort zone. However, there was one cake, a towering confection of lemon and white chocolate, that caught my attention. When I saw it, I thought, "Ooo, lemon, Justin would like that... maybe for his birthday?" But, I talked myself out of it quickly, as it seemed like far more than I really wanted to tackle at the time. 

Fast forward a few months though, and I was even more in love with Justin than I was when I first spotted that cake in Beranbaum's book. So completely besotted was I, that my overwhelming love inspired me to completely outdo myself in his honor. Hence, it was with this noble goal in mind that I undertook the single most complicated endeavor of my career in baking.*

The finished product. Sadly, after all that hard work, my cake decorating skills weren't quite up to par. I think the solution for my next cake will be getting a cake comb and using that to create decorative sides that will camouflage my sloppy icing work.

To create "Woody's Luxury Lemon Cake" as it appears in Rose's Heavenly Cakes so that it would be ready to eat on a Friday night, I had to allocate four consecutive evenings of baking. (The cake could be assembled in less time, but I work during the day so I had to space things out.) I turned down plans with friends, blew off dinner invitations, and hunkered down in my kitchen night after night, applying a level of self-discipline that only seems to manifest itself in my life when it comes to major baking projects. Justin, feeling a bit guilty I think about all the time I was planning to sink into his cake, offered to come over and help, but I demurred. Baking this cake would be like my equivalent of climbing Mount Everest -- it doesn't count if someone carries you part of the way up.

I briefly entertained the idea of writing a separate post for each phase of construction, including the recipes for each component, but I quickly came to my senses and realized that few people in their right mind would want to replicate this task at home. Instead, I'll summarize:

The birthday boy, at his family celebration.
On the first night, Monday, I started out by preparing a lemon curd that would serve as the filling for the cake. I actually think this was the easiest component of the entire process, even though I'd never made lemon curd from scratch before. I've used lemon curd from a jar for other desserts, but the homemade version is really much tastier (big surprise). I'm not a fan of lemon desserts in general (prompting the question from many why I was expending so much effort on baking something I wouldn't even enjoy eating -- again, it was a labor of love thing), but the homemade lemon curd was really pretty tasty.

For the second night, cake baking was on the agenda. I followed all of Beranbaum's anal-retentive, nit-picky instructions to the letter: I used freshly purchased cake flour instead of trying to make some sort of substitution using all-purpose flour and corn starch; I buttered the pans, added parchment paper rounds, then sprayed the entire thing with Pam with flour, even though all those steps seemed like overkill; I even purchased Valrhona brand white chocolate from the gourmet shop at the outrageous expense of $17/pound to be ensured of a white chocolate with a sufficiently high cocoa butter content. 

Still, in spite of doing everything as written, I still ran into some troubles. Beranbaum specifically instructed not to bake the cake until it pulled away from the edge of the pan as it would then be overdone, and therefore dry. However, the interior of the cake was still entirely liquid up until the point when this very thing happened. I think the cake was sufficiently moist, and the crumb was by far the finest, most uniform of any from-scratch cake I've ever made. Demanding as she is in her instructions, she may just be on to something...

I chilled the cake overnight, but allowed it to come to room temperature before serving. It cut like a dream.

Day three of the process was dedicated to what was, by far, the most stressful component of the cake for me -- the white chocolate vanilla bean buttercream frosting. Because I don't like frosting, I very seldom make it. In fact, I believe I could probably count on one hand the number of different frosting recipes I've made in all my years of baking. Factor into this lack of experience the fact that I was about to roll the dice with nearly $20 worth of artisan white chocolate, and the stakes suddenly became uncomfortably high. Plus, the online accounts I'd compulsively read of other, more experienced cake bakers who attempted this recipe were not exactly encouraging. Despite my misgivings, however, I soldiered on.

For a while, the frosting situation was indeed touch-and-go. The recipe, from what I understand about buttercreams, is somewhat unusual. Most buttercream frostings are made by creating some manner of stable meringue, then gradually incorporating butter and flavorings. This one called for the production of a white chocolate custard, which was to be cooked to a very specific temperature, then cooled to a specific temperature, then whipped into butter. (Did I mention that this cake was not low-cal? It included some 16.5 ounces of white chocolate, 17 eggs, and 4.5 sticks of butter. Hopefully, I did not shorten Justin's lifespan by baking this for him to celebrate his birthday!)

When I went to melt the white chocolate and butter for the custard, it quickly turned into a terrifying mess; the white chocolate turned lumpy and sunk to the bottom, while the melted butter sat on top in a vast, greasy slick. I was terrified that I'd screwed it up, but I managed to keep panic at bay long enough to take a whisk to the monstrosity and beat it into a semblance of being smooth and creamy. The eggs seemed to stabilize the mixture, and the recipe was smooth sailing, if demanding, from there.

The cross section. From the bottom up we have cake, lemon curd, cake, buttercream, cake, lemon curd, more cake, and the whole thing is covered with the beautifully vanilla-speckled frosting.
Finally, the day before the cake was to be served, I assembled the whole thing. Though I clearly need more practice splitting cake layers evenly, and my frosting skills need a lot of work (any volunteers out there want to eat my homework?), the assembly of the cake was the fastest part. Even if I had imagined it coming out much more attractive than I was able to realize in reality, I knew that it was ultimately going to be Justin's birthday cake, and he'd probably care more about how it tasted than how it looked.

After all that work, I did manage to produce a fairly tasty cake. I can't call it fantastically delicious because I really don't like lemon cake, but I managed to impress where it counted: Justin proclaimed it the best birthday cake he's ever had. He could be a little biased toward the chef, but I'm going to accept that compliment and move on. 

Texturally, it was the most perfect cake I've ever made. Plus, I did like the frosting, and that almost never happens. It was supremely smooth and silky, and though it did taste very rich, I felt that it made the cake live up to its moniker as an item of "luxury." Though it would have to be for a very special occasion, given the expense of the ingredients, I would definitely make that white chocolate vanilla bean buttercream again.

I will say, that conquering such an intense recipe left me feeling pretty good about my baking skills. I went into this project wanting to do something nice for Justin, but in the process, I managed to boost my own confidence and improve my skill set. But then, isn't that what is so great about love? When we give freely of it to others, we not only benefit them, but ourselves as well. As the Beatles said, "The love you take is equal to the love you make."

*My annual Cookie Bonanza requires at least as much time, and a great deal more planning to execute, but no single recipe that I prepare for that is as complicated or time consuming as this cake was to bake, not even the iced sugar cookies that are the star of the yearly giveaway.

7.14.2011

When Life Gives You Lemons...

The produce section at the grocery store is an embarrassment of riches lately. Every time I go in there, there are so many beautiful and reasonably-priced summer fruits, only available for such a fleeting period of time, that it's literally all I can do to stop myself from buying them all. Peaches, raspberries, and blackberries -- I've been buying them like a mad woman, taking them home, washing them, then freezing them for future use in sorbets. It's cheaper and tastier than buying pre-frozen fruit at the grocery store, but now my freezer looks a little something like this:


This is why, when I compulsively bought even more peaches at Whole Foods this week (yes, they cost more twice as much as the ones I've been buying at Jewel, but they were so much more gorgeous and fragrant, plus they turned out to be free-stone peaches instead of cling-stone, so the time I saved cutting them up almost justified the extra $1.50 per pound) I realized I really didn't have the space to add even more frozen fruit to my stash. Dad, who was over for the evening, cajoled me to make him a peach pie, but I was in no mood after spending nearly eight hours on my 4th of July apple creation. With my fruit teetering on the precipice of over-ripeness, I knew I had to take action quickly, so I turned to the internet once more, for a recipe I had recently spotted for roasted peach lemonade.

As it turned out, I had also massively overbought on lemons for this week's lemon ginger bars, so creating a beverage from both fruit surpluses would kill two birds with one stone, and prevent the kitchen waste that I've been trying so hard to eliminate from my life. Although making the lemonade portion from scratch was a little time consuming, this recipe wasn't difficult and it felt like it came together relatively quickly despite the time spent on juicing a half dozen lemons by hand. I managed to get everything finished in the time it took the peaches to roast in the oven, and from there it was just a quick spin in the blender before I had a beautiful pitcher of peach lemonade just waiting to go.

The peach lemonade was the perfect summer beverage -- sweet and velvety on the tongue from the peaches, but gently tart and refreshing from the lemons. Even though I'm enjoying it from the comfort of my air-conditioned apartment, I could envision sitting out on well-shaded porch with a tall, frosty glass of this lemonade. It would also be perfect for summer entertaining, especially for gatherings with children, since it is non-alcoholic. If you find yourself with your own surplus of peaches this month, I highly suggest giving this roasted peach lemonade a try.


Roasted Peach Lemonade
adapted from The Naptime Chef

4 ripe peaches, halved and pitted
1 c. plus 2 tablespoons sugar
6 lemons
4 c. water, divided

Preheat the oven to 400.
1. Place the peaches skin side down on a baking sheet and sprinkle the tops with the 2 tablespoons of sugar. Roast the peaches about 20-25 minutes until the tops of the peaches are juicy and the skins slip off easily.
2. Meanwhile, make a simple syrup by combining the remaining cup of sugar and a cup of water in a small saucepan and cooking over medium heat until dissolved. Remove from heat.
3. Juice the lemons and strain out the seeds. Combine with the simple syrup and remaining 3 cups of water in a blender.
4. When peaches are done roasting, remove their skins and place them in the blender with the lemonade. Puree the peaches completely, until liquid is smooth and frothy.
5. Pour the mixture into a pitcher and chill until ready to serve. Stir thoroughly with a wooden spoon before serving.

7.12.2011

Pucker Up...

As a general rule of thumb, I do not much enjoy being outside, especially in the summer when the weather is hot and sticky. I'm not exactly sure how people survived in the days before air conditioning, but I'm happy to have been born into the era of central air. Otherwise, I would have had to pursue science as a career track, so I could spend my life engaged in research in Antarctica.

Nevertheless, for some reason, I really enjoy picnics. I loved them when I was little, and my mom would fill up a cooler with special treats, pack up an old Native American blanket she'd purchased long before I was born, and take me to the park to eat and play. In college, my friends and I made a tradition of having a picnic every year, often in old, dilapidated cemeteries around St. Louis. I've tried to maintain that tradition on my own, and I've been moderately successful with making it to Grant Park for an annual alfresco dining experience. Justin and I even went on a picnic on our second date.

Tomorrow, I'm meeting Mireya, Natasha, and Natasha's family for my annual pilgrimage to the Pritzker Pavilion in Millennium Park for a free concert, so it seemed only right to combine a picnic with the evening's events. Naturally, I assumed responsibility for dessert production, but with my self-imposed moratorium on Martha Stewart, I had to look elsewhere for inspiration. I settled on a recipe I'd bookmarked from one of my favorite food sites, Serious Eats. They have a seemingly ever-expanding roster of authors contributing there, and have recently launched a dessert-focused subsection called "Sweets," where I'd spotted a recipe for Lemon Ginger Bars. Since I've become a convert to the ease of baking bar cookies, I was saving this recipe for just the right occasion.

As it turns out, Natasha is a huge fan of ginger (I've used her as a guinea pig for my last two ginger-centric baking experiments), and Justin loves lemon, so I figured this picnic gathering was the perfect opportunity to test this recipe. Despite making a rookie mistake when I turned the bars out of their baking pan that resulted in them shattering into a dozen or so irregular shards, the resulting cookie shrapnel turned out delicious, if somewhat unattractive by my usual standards. Not being a fan of lemon myself, I preferred the bits that had less glaze, as the bars themselves have a subtle hint of lemon flavor from the included zest, while the majority of the lemon punch comes from the topping. The cookies are warm from the ginger, with an occasional kick from the chunks of crystallized ginger, in addition to being pleasantly soft and buttery.

Besides being quite tasty (which is hard for me to admit, as a self-identifying hater of lemon-flavored desserts), this recipe came together quickly, which I also appreciated. They'll definitely be a strong contender for the citrus cookie category in this year's Cookie Bonanza come December. Until then, consider giving them a try of your own.


Lemon Ginger Bars
adapted from Nick Malgieri

Bars
2 1/2 c. all-purpose flour
3/4 c. sugar
2 tablespoons ground ginger
2 teaspoons baking powder
1 c. (2 sticks) unsalted butter
1 large egg
1/4 c. crystallized ginger, finely chopped
2 tablespoons honey
2 teaspoons lemon zest

Lemon Glaze
2 c. powdered sugar, sifted
3 tablespoons freshly-squeezed lemon juice, plus extra if needed

Preheat oven to 375. Line a 9x13-inch jelly roll pan with foil and spray with Pam.
1. Mix the flour, sugar, ginger, and baking powder in a medium bowl.
2. Melt the butter in a glass container in the microwave, and immediately add to the dry ingredients. Use a rubber spatula to stir into a smooth, shiny dough. Add the egg, crystallized ginger, honey, and lemon zest, beating vigorously until smooth.
3. Press the dough into the prepared pan, smoothing the surface with the palms of your hands.
4. Bake the bars until well-risen, golden brown, and firm, about 20-25 minutes.
5. While the bars are baking, combine the lemon juice and powdered sugar. Add additional lemon juice to thin to a spreadable consistency, if needed.
6. As soon as the bars are baked, remove from the oven. Place a cooling rack on top of the pan and invert, removing the foil. Pour the glaze over the bars, spreading to coat, and allow to cool completely before cutting into 2-inch squares.

11.07.2010

Sweet And Sour...

If there is a theme to this year's pre-holiday cookie recipe run-through, it would be the presence of thumbprint cookies. As I wrote when I made the chocolate rendition, I felt last year that the only think missing from my assortment was a thumbprint cookie. Since the chocolate cookies weren't right for this year's Cookie Bonanza, I pressed forward this weekend with another attempt to capture the genre. This time, I opted for a recipe for poppy seed thumbprints from Carol Walter's Great Cookies: Secrets to Sensational Sweets that I had spotted when I was searching for cookie inspiration last month.

In the author's version, the cookies were filled with raspberry or apricot preserves, but when I saw the poppy seeds, my first thought was lemon.
I always strive to include a citrus-flavored cookie in my holiday lineup, and last year's entry, Ginger & Lemon Cookies, struck me as somewhat mediocre. Knowing I had room for improvement, I decided to adapt Walter's recipe, swapping fruit jam for store-bought lemon curd, and adding lemon zest and lemon extract to the dough. I prepared half of the dough to the recipe's specifications (just for experimentation's sake), and half using my alterations.

Since I'm not a fan of lemon at all, I preferred the cookies made from the original recipe, which I filled with peach preserves. However, the lemon cookies, which I shared with more lemon-friendly palates, were a rollicking success. My coworkers came by to express their appreciation in person instead of sending emails, and Justin proclaimed them some of the best cookies he's ever had (though he might be a tiny bit biased towards the chef.) The lemon version has earned an instant entrance into this year's Bonanza, so look for them to make another appearance in December...

Though I'm only including the recipe for the lemon cookies, this picture features a combination of the lemon and peach versions.

Lemon Poppy Seed Thumbprints
adapted from Carol Walter

2 c. all-purpose flour
1/4 tsp. salt
1/4 c. poppy seeds
1 c. unsalted butter, slightly firm
1/2 c. sugar
2 large egg yolks
1 tsp. pure vanilla extract
1/2 tsp. lemon extract
zest of one lemon
Lemon curd

Preheat the oven to 350.
1. Whisk together flour, salt, and poppy seeds in a large bowl. Set aside.
2. In the bowl of an electric mixer fitted with the paddle attachment, mix the butter on medium-low speed until smooth. Pour in sugar and mix until just incorporated. Add the egg yolks, extracts, and lemon zest, mixing only until blended. Stir in the flour mixture on low, in two additions, until just combined. Do not overmix.
3. Roll the dough into walnut sized balls and place 2 inches apart on a parchment-lined cookie sheet. Using the rounded end of a wooden spoon (approximately 1/2 inch), make a deep indentation in the center of each cookie, dipping the spoon in flour between each cookie.
4. Bake for 10 minutes, remove from oven, and repress the indentations with the end of the spoon. Fill the centers with the lemon curd, being careful not to overfill.
5. Return cookies to the oven and bake 4-5 minutes more, or until cookies are golden brown around the edges. Cool on wire racks.

12.19.2009

Tis The Season...

The holidays are all about the joy of giving. We give presents so that we can see the joy on people's faces when they open them, and to show them how much we care for them. I prefer to show my love through baking, which sometimes means that I bake things not because I enjoy eating them, but because it will make somebody else happy to eat them. Such was the case with the first thing I remember learning how to bake -- lemon bundt cake. My Aunt Lois was staying with me while my mother was out of town (with Dad working long hours as always, someone needed to be there when I got home from school), and we decided to bake something for Dad that he would like. Dad had had Lois' lemon cake before and liked it, so that's what we made that day, and for several years, it was the only thing I knew how to bake, which is ironic, because I don't even like lemon. I've lost track of how many times I've made that cake -- lemon is always a crowd pleaser -- and while I always enjoy the process of baking it, never once have I enjoyed eating it. It is something that I only do for the benefit of others.

Similarly, when I was curating the list of cookies to include in my annual Cookie Bonanza, I was trying to achieve a balance of flavors. I already had chocolate and peppermint, in the form of my Chocolate Peppermint Cookies; maple in the form of my Maple Pecan Shortbreads; I knew I was going to make some decorated sugar cookies utilizing my new decorating set, and some spritz cookies using my new cookie press; I wanted a spice cookie, and that left me an opening for one more. I wanted to make thumbprint cookies with a chocolate filling (I don't care for fruit in my cookies), but I already had a chocolate cookie in the mix. Going through my spice shelf for inspiration, I came across a bottle of crystallized ginger that was nearing its expiration date, so I started looking for a recipe to use it up. Lo and behold, I found one for a lemon ginger cookie. I don't care for lemon, but I knew that the people receiving my cookies would probably appreciate a lemon offering, so I made up a batch.

The unusual dough contained no leaveners, resulting in a sandy, crumbly cookie, accentuated by the crackly coating created by the pre-baking dip in egg white and sugar. The cookies were refreshing, and not exceptionally ginger-y, besides some residual heat on the palate after consumption. I'm sure the ginger flavor would have been more pronounced if I had used a fresher bottle of crystallized ginger. Since I knew I was doomed to dislike the cookies due to their flavor combination, I brought a few to work to test out on Natasha, a self-professed ginger enthusiast. They won her stamp of approval, so if you like lemon, feel free to treat yourself to a batch of these. If you don't like lemon, consider making them for someone in your life who does. They'll appreciate every tasty morsel.


Ginger & Lemon Cookies
adapted from The Best of Fine Living: Cookies, 2008

1 c. (2 sticks) unsalted butter, at room temperature
3/4 c. plus 2 T. granulated sugar
3 T. finely grated fresh ginger
finely grated zest of one lemon
1/4 tsp. salt
2 large egg yolks
1/2 tsp. pure vanilla extract
1/4 tsp. pure lemon extract
11 1/4 oz. all-purpose flour
2 T. finely chopped crystallized ginger
1 egg white, lightly beaten

1. Preheat oven to 350.
2. In bowl of a stand mixer, combine the butter, 3/4 cup of sugar, grated ginger, lemon zest, and salt, and beat on medium speed until well-blended and light, 2 to 3 minutes. Add the egg yolks and vanilla; continue mixing until well-blended, 30 to 60 seconds. Add the flour and mix on low speed until the dough is blended and just comes together.
3. In a small bowl, combine crystallized ginger and 2 tablespoons of sugar. Shape dough into 1-inch balls and roll in eggs whites. Dip the tops of the dough balls in the sugar/crystallized ginger mixture, and set the balls 1 1/2 inches apart on parchment-lined baking sheets.
4. Bake 11-13 minutes until cookies are light brown around the edges. Let cookies cool on the baking sheet for 5 minutes before removing to a wire rack to complete cooling.