Pages

Showing posts with label food. Show all posts

4.10.2013

Rain, Rain, Go Away...

It rained today, it rained yesterday, it rained Monday, and there is rain in the forecast for Thursday and Friday as well. I suppose I should be thankful that it is at least staying warm enough that it is raining and not snowing, but that is little consolation in a week that is as dark, dreary, and damp as this. Really, when conditions are this miserable, there is only one thing to do, and that is to hole up at home and make soup... again. Even though we had soup yesterday, there was only one thing that sounded good for dinner tonight and it was another piping hot bowl of comforting, delicious soup.

This time, I turned to another old, beloved recipe which I almost always have all the ingredients for in my house at any given time. That is not to say that it has common ingredients, but rather, that I am the kind of person that considers Parmesan cheese rinds and cannellini beans to be pantry essentials. Actually, I largely consider them to be must-haves in my kitchen because I love this soup recipe so much that I need to be able to make it on the fly.

The only reason that I haven't seen fit to blog about it in the past four years is that it is a polarizing recipe; whereas I love it, and Justin enjoys it, both of my parents dislike it because it is pureed, and they prefer their food to have texture. I find it so savory and flavorful that I don't miss having to chew, plus, I don't really enjoy the texture of beans or their skins -- a problem that is solved by pureeing. I wasn't sure how other people would feel about eating a virtually liquid soup, and the bowl of texturally homogenous beige liquid doesn't exactly photograph in a way that sells its enticing qualities, so I kept this recipe to myself for years.

However, now that I needed to try to get a decent picture of it for my new recipe book, I figured it was time to go public with this recipe and let you make your own decision about whether pureed food is right for you. It really is one of my favorite soups in my repertoire, not only because it involves minimal chopping and prep-work, but because all that Parmesan cheese basically turns it into a big bowl of umami, that elusive but highly satisfying fifth taste. If you leave out the heavy cream, as I sometimes do when I want to freeze the leftovers or I just don't happen to have any, you have an almost healthy dish on your hands. Plus, if you prepare it with vegetable broth, it's a lovely vegetarian meal, if you're entertaining guests who don't eat meat.

If you don't mind the lack of texture or toothsomeness, please, I implore you to give this soup a try. Your palate will thank you.


White Bean and Garlic Soup
adapted from Giada De Laurentiis

2 shallots, chopped
2 tablespoons butter and 1-2 tablespoons light olive oil
2 15-oz cans of cannelini beans, rinsed and drained
5 cloves garlic, halved
1/2 teaspoons dried sage
4 cups chicken stock
2 Parmesan cheese rinds
1/4 - 1/2 cup grated Parmesan cheese
freshly cracked black pepper to taste
1/4 cup heavy cream (optional)

1. Melt the butter with the olive oil over medium high heat in a large pot.
2. Add shallots and a bit of salt and cook until softened, about 3-5 minutes.
3. Add the beans, sage, chicken stock, garlic, and cheese rinds. Bring to a boil.
4. Reduce heat to low and simmer for 25-30 minutes.
5. Turn off heat, remove cheese rinds and puree soup using an immersion blender.
6. Stir in the grated cheese and heavy cream (if using) and warm through over low heat. Serve with fresh artisan bread.

4.09.2013

Straight Up Ballin'...

I have an embarrassing confession to make: back in the early days of my cooking career, when I was teaching myself how to cook, a significant portion of my burgeoning recipe portfolio came from Rachel Ray. Yes, I know, she's incredibly annoying and foodies love to pick on her, but before she had her own talk show and dog food line, and she was known predominately for her show "30 Minute Meals" and not for her myriad catchphrases, she wasn't so bad.

I would watch her every day when I got home from class and was just starting on my homework. If whatever she was making caught my eye and didn't feature too many ingredients I didn't care for, I would try to give them my best shot. If you think about it, the "30-Minute Meals" concept is really perfect for someone who is learning to cook: the recipes can't be too complicated or demanding, and if you totally screw everything up, the relatively small investment of time creates an atmosphere in which it is okay to fail.

One of my favorite early Rachel Ray recipes was actually not one that I saw on her show, but rather, one that I accidentally stumbled across while surfing the Food Network website. I had been feeling ambitious that day, and performed a search for dumpling recipes with the thought that I might as well learn how to make one of my favorite foods.

One of the top hits, was for a Hungarian-inspired Rachel Ray soup that that actually didn't have dumplings at all, but rather turkey meatballs. I wasn't really sure where she got off calling them dumplings, but the recipe called to mind Italian wedding soup due to the mini-meatballs, and since I harbor a soft spot in my heart for Italian wedding soup, I decided to give it a try anyway.

I made a few modifications to her recipe, eliminating peppers and substituting regular paprika for the smoked paprika she called for since the smoked variety could not be located in the St. Louis grocery store I frequented in college. Nonetheless, I was ultimately quite satisfied with my results, and I ended up making the resulting soup over and over for my friends and non-red meat eating roommate while I was in school.

I kept making the soup with relative frequency until I met Justin, who deemed the dish bland. Because he wasn't a fan, I would occasionally trot it out whenever he was feeling sick, but other than that, it fell out of regular rotation, and all my ground turkey purchases found their way into turkey burgers, which are one of Justin's favorite dishes. Since I didn't do much savory food blogging until after we met, the recipe never made it to my blog either.

Without a picture of it, however, Justin couldn't cross this recipe off his Tastebook to-do list, so he had to suck it up and eat it for dinner tonight. Having finally located smoked paprika for the Spanish lentil soup we made last month and listening to Justin proclaim it his new favorite spice, I decided to swap it back into the recipe in an effort to earn his favor, and surprisingly, my gambit paid off. He proclaimed the soup to be much less bland and much tastier, though the difference was barely noticeable in my opinion.

I'm not going to look a gift horse in the mouth, however. If this simple change will allow me to enjoy this soup more often, I am more than willing to make it. If you choose to give this soup a try (and I think you should), feel free to use whatever kind of paprika suits your fancy.

 
Hungarian-ish Mini-Dumpling and Egg Noodle Soup
adapted from Rachel Ray

8 cups (2 1-quart boxes) chicken stock
1 pound ground turkey breast (NOT lean)
1 egg
3/4 - 1 cup plain bread crumbs
1/4 teaspoon freshly grated (or not) nutmeg
1 teaspoon smoked sweet paprika
dried parsley (eyeball it)
salt and pepper (to taste)
1 1/2 cups egg noodles
6 scallions, chopped

1. Heat stock to a boil in a large pot; reduce to a simmer.
2. Mix the turkey with the egg, bread crumbs, nutmeg, paprika, parsley, salt and pepper. Roll the meat mixture into 3/4 inch balls and add to the simmering stock. Allow the meatballs to cook for 3-4 minutes.
3. Add the egg noodles and scallions, then season again with salt and pepper. Cook for another 4-5 minutes or until the noodles are tender. Serve immediately.

4.08.2013

Golden Oldies...

When I left for college and set out into the world, I was armed with one critical tool in my arsenal: my handwritten cookbook. Granted, at that point in my life, I barely knew how to cook, having watched the Food Network for years, but picking up virtually no practical experience along the way. My cookbook was populated with only a few recipes that I had learned from Mom, and a few recipes that I had copied from her recipe collection that I knew I liked but had never helped her make. As I taught myself how to cook, I loving transcribed my favorite recipes into the book, creating an elite tome of only the best recipes in my repertoire that I turn to again and again.

Some of those dishes have made it onto my blog over the years, but a lot of them exist only in that space because I figured they would be of interest only to me. For example, I figure nobody really cares about my spaghetti recipe, which is basically a set of instructions on how to doctor up a bottle of Ragu the way that my mom does. This is vitally important information for me, but probably not of general interest to other cooks out there.

Over the years, however, my precious collection of recipes has been loved perhaps a bit too hard. The pages are covered in stains, some are tattered from the book having been dropped, and the binding is disintegrating. When I pointed out the carnage to Justin, and asked him to be gentle with it whenever he uses it, he came up with the idea of creating a Tastebook, a customized recipe book that you create online and have printed by the Tastebook company. He created one for his family using his grandmother's recipes as a Christmas gift a few years back, and he decided that he would do the same for me as a birthday gift.

Though it takes a considerable investment of time and energy to enter all the recipes, you have the ability to add a photo for each recipe - something that was lacking in my homespun version - and you can order reprints and add recipes over time as it becomes necessary. It was really a perfect gift idea.

Of course, the amount of effort necessary to undertake this task was lessened somewhat in my case because of my blog, from which Justin could simply copy and paste, and for which images already existed. However, not every recipe in my repertoire is represented on my blog, especially family recipes, dishes that I don't frequently prepare, and items that are not photogenic to the extent that I feel like nobody would want to make them based on the associated image. Justin is determined to include an image with every recipe, so I find myself newly motivated to dust off some of my old favorites, and challenge myself to take the best photos possible of some of the ugly ducklings in my oeuvre.

Tonight, I tackled a recipe for chicken fingers, of all things. It is something that my mom used to prepare when I was younger, and it was one of my favorites, even though she rarely prepared them. When I transcribed her recipes, I included it out of nostalgia, but I never actually tried to make it, partially because my palate has changed and partially because I did not own the pizza stone required to make it until just recently. Now that I have one, however, there was no excuse not to revisit this recipe, so I stocked up on pre-fab croutons and found a place for this meal in our weekly meal plan.

It was a simple enough dish to put together, and the garlic croutons add a novel flavor that is interesting enough for adult taste buds, but simple enough to appeal to kids. Baking the chicken makes the dish healthier than the fried alternative, but with the processed croutons, I wouldn't exactly call it healthy per se. I don't really have very many kid-friendly recipes here at "The State I Am In," so if you are looking for something to feed your children for dinner tonight, this may be your best bet.


Crispy Parmesan Chicken Strips
adapted from the Pampered Chef

1 1/2 cups seasoned croutons, crushed
1 1/2 ounces (1/3 cup) fresh Parmesan cheese, grated
1 teaspoon dried parsley
1/2 teaspoon garlic salt
2 egg whites
1 tablespoon water
1 lb boneless, skinless chicken breast halves, cut into 1-inch strips

Preheat oven to 450°.
1. Crush croutons in resealable plastic bag.
2. In a medium bowl, combine croutons, cheese, parsley, and garlic salt.
3. Whisk egg whites and water in a small bowl.
4. Dip chicken pieces into the egg mixture, then into the crumb mixture to coat evenly.
5. Bake for 14-16 minutes or until chicken is no longer pink in the center. You may wish to turn the chicken after 8 minutes.

3.30.2013

Apple of My Eye...

Let's be real for a moment - if you are having a party, especially a dinner party, you probably want to include me on the guest list. Why, you ask? It's not because of my dazzling wit and formidable intellect; it's because I will bring dessert. I will most likely bring dessert whether you ask me or not. It's really not even about you or your gathering, but because I am always looking for an outlet to dispose of the excess baked goods that result from my baking habit.

This is precisely how I found myself in the kitchen whipping up an apple pudding cake, a classic recipe from my mother's somewhat limited baking repertoire. It was the dessert she would prepare whenever she was entertaining or hosting a dinner party, because it was impressively delicious, even if it was somewhat homely in appearance. The addition of a cinnamon-scented, butter-based sauce elevates the moist, heavily spiced cake and adds an elegant touch. I've made it several times before, but it had been such a long time that it was one of the first things that popped into my mind when I discovered that we were invited to Justin's parents' house for Easter dinner.

Sure, transporting the sauce in a separate container would make for unnecessary logistical complications, and we'd also have to figure out a way to reheat both the sauce and cake to make sure everything would be served at the optimal temperature, but I was undeterred. Though not technically difficult or impressive in a conventional sense, I knew I needed to share the unparalleled deliciousness of this cake with my future in-laws as part of my ongoing mission to win my way into their hearts via their stomachs.

Only time will tell if my gamble will pay off, but really, this cake is kind of a sure thing in the flavor department. If you are looking for a dessert to serve at your next gathering and cake decorating isn't your strong suit anyway, please look no further than this recipe -- you seriously can't go wrong with this one. It is so good that your guests are bound to be impressed, no matter what it looks like.


Apple Pudding Cake with Cinnamon Butter Sauce
adapted from Classic Pillsbury Cookbook #153

For Cake:
1 cup firmly packed brown sugar
1/4 cup butter, softened
1 egg
1 cup flour
1 teaspoon baking soda
1 teaspoon cinnamon
1/2 teaspoon nutmeg
1/4 teaspoon salt
2 cups chopped apples

For Sauce:
1/2 cup unsalted butter
2/3 cups sugar
1/3 cup half-and-half
1/2 teaspoon cinnamon

Preheat oven to 350° and grease one 8-inch square pan.
1. In a large bowl, beat brown sugar and butter 2-3 minutes. Beat in egg until combined.
2. Add flour, baking soda, cinnamon, nutmeg, and salt. Mix well.
3. Stir in apples. Spread batter in greased pan - please note that it may be stiff and hard to spread.
4. Bake for 25-30 minutes or until a toothpick comes out clean.
5. Meanwile, combine all sauce ingredients in a small sauce pan. Heat over medium heat until butter melts and sauce is hot, stirring frequently.
6. Serve warm sauce over warm cake.

3.28.2013

Go Nuts...

As I've slowly convalesced this week, along with my returning health has come a growing compulsion to bake. Maybe it has something to do with my desire to console myself over the loss of my trip to Berlin, but I've been longingly looking through the Momofuku Milk Bar book this week planning my next cookie experiment. Initially, I was drawn to the Funfetti-inspired cookies, but then I realized that I could never bake such a cookie without being able to share it with my cousin Trista, the biggest Funfetti fan I know. Then I considered the decadent looking chocolate cookies, before ruling them out in favor of a chocolate birthday cake in the weeks to come. That left me with the Milk Bar version of peanut butter cookies in terms of recipes I could make using ingredients that I had on hand.

Initially, I had ruled out the peanut butter cookies since I already have a perfect recipe for them, handed down to me by my mother, who learned how to bake them in her 4-H group as a girl. I figured that even Christina Tosi would not be able to improve upon them, but as I was perusing my usual assortment of food blogs and food blog aggregator sites, I happened to come across a post someone else had written about Tosi's recipe. The blogger proclaimed them the greatest peanut butter cookies she had ever eaten, let alone baked herself, and I felt a sudden obligation to give them a try, if only to make sure I wasn't missing anything.

As with most of the Momofuku Milk Bar creations, I had to work through at least one nested recipe before I could get to the cookies themselves. In this case, at least there was only one, and it was for "peanut brittle," though that's not really the correct descriptive term to use. Tosi's "brittle" consists of little more than sugar and nuts, creating something that can only be used when ground up into a near-powder in the food processor, as the glass-like shards are too sharp and too hard to eat on their own, like a conventional peanut brittle. The logic behind this step, I believe, is that the tiny fragments of caramel and nuts melt into the cookies, producing a chewier end result with caramelized flavor overtones.

Though I am fairly comfortable with caramelizing sugar at this point in my cooking career, this step still irked me somewhat, as the cookie recipe only called for half of the "brittle" I was required to make, leaving me with a surplus that I have no idea what to do with. I would have just made half as much "brittle," but it is notoriously difficult to caramelize small amounts of sugar evenly. I could maybe turn it into an ice cream mix-in, or else I'm going to have to make more cookies.


Not that that would be the worst thing in the world, mind you. The cookies, like the corn cookies, turned out very well. As promised, they were delightfully chewy in the center, whereas my usual go-to peanut butter cookie is more crumbly. They were also a huge hit at the office among my coworkers who have yet to sample the joys of my standard recipe. For me, however, these cookies just didn't quite measure up. I still prefer the texture, flavor, and the ease of preparation of my usual peanut butter cookies, even though I'm usually "team chewy" when it comes to cookies.

I'm glad I gave Tosi's cookies a shot, even if they didn't beat out my heirloom recipe, and I'm even more glad to have scratched another Milk Bar recipe off my to-do list so that Justin can get the book back to the library. I'm not sure why this book has captured my imagination in such a palpable way, but I simply can't rest until I've tried every delicious-looking cookie in there!

3.18.2013

Pop It Like It's Hot...

For better or worse, I now share my home with a voracious snacker. I've actually never been much of a snacker; I usually consume snack foods in meal-size portions like half a bag of Doritos in one sitting, or a third of a package of Oreos at a time (though I'm doing better on that front than I did when I was in college). I never really snacked much growing up either, in fact, the after school snack enjoyed by so many kids was practically an unknown entity in our home, probably because we always ate dinner so early, usually around five o'clock.

However, my beloved is a constant grazer -- at times, I wonder if there is a black hole where his stomach should be. As a result, we keep more snack foods in the house than I ever did as a single person, and I find myself constantly on the hunt for new snack ideas that previously would have flown under my radar.

It was one of these ideas that Justin spotted when I finally managed to get him to look at my food-related Pinterest boards yesterday, to get his input on what he might be interested in making, now that he is doing more of the savory cooking around here. With laser-like focus, he honed in on a popcorn recipe I'd saved, that called for smoked paprika and Japanese snack crackers. You see, Justin already has a recipe in his repertoire for a popcorn and Japanese snack cracker blend, so I though he might like to try this variation just for the sake of trying something new. I was right.

Given our bountiful and well-stocked pantry, we actually had everything we needed to make this popcorn treat in our house already, despite the somewhat exotic ingredient list. Justin whipped up a batch today, almost the moment we walked in the door after work.

I wasn't even planning on eating it at all, since I'm sort of a popcorn traditionalist, and prefer to stick to butter and salt on mine. But as Justin rhapsodized over his new creation and proclaimed smoked paprika to be his new favorite spice, I decided to give it taste. I actually rather enjoyed the smoky/sweet combination that came from the paprika and a sprinkling of sugar. It was like a more complex version of kettle corn.

The rice crackers weren't doing it for me, but then again, I've never really been a fan. As it was, I just sort of picked around them, but in the future, if we were ever between visits to H-Mart and out of rice crackers, I would be more than happy to eat the popcorn with just salt, sugar, smoked paprika and butter. It may even turn me into snacker...


Smoky Popcorn
adapted from Food & Wine

1/4 c. vegetable oil
1/2 c. plus 2 tablespoons popping corn
1 teaspoon smoked hot Spanish paprika
1/2 tablespoon sugar
1/2 stick unsalted butter, melted and kept warm
1 tablespoon Japanese furikake mix*
2 c. Japanese mixed rice crackers
Kosher salt

1. In a large saucepan, combine the oil and popcorn, cover and cook over moderate heat until it starts to pop. Shake the pan and cook until the corn stops popping.
2. Transfer the hot popcorn to a large bowl. Sprinkle with the paprika and sugar and toss well. Drizzle with the butter and toss, adding the furikake and rice crackers. Season with salt, toss again and serve.

*Furikake is a seasoning mix that includes seaweed, sesame seeds, sugar, salt and dried bonito (dried fish flakes).

3.17.2013

Spill The Beans...

I'll admit it -- I've fallen off the wagon with regard to my plan to clean out the freezer. I made some progress, and got rid of some of the items that had been lingering in there a questionably long time, but for everything that I removed and used, I found something new to take its place, and the freezer remains as full as ever.

In spite of this failure of will, one meal planning stratagem that remains enmeshed in my arsenal is making an effort to select chains of recipes that utilize the same ingredients, so that I waste less food. For example, I had to buy rosemary for Friday's ditalini with chickpeas, so I started looking for other recipes that also utilize the herb to get the most out of my purchase. This led me to the rosemary lemon white bean dip I made yesterday while I was home alone, and to request herbed baked eggs for breakfast from Justin this morning.

Tonight, it was on to Creamy White Bean Soup with Chorizo, for which we had all the ingredients on hand except the dried beans and the Mexican-style chorizo, which we were able to find at one of the Hispanic grocery stores in our neighborhood. We actually forgot to start soaking the beans the night before (I very rarely used dried beans; though everyone asserts their textural superiority, I prefer the convenience of the canned variety), so it turned out to be a rather late dinner by the time we had finished waiting for them to soak.

Contrary to the recipe, I decided to sauté the sausage first and cook the vegetables in it, as it seemed like a shame to waste the extra flavor, but the chorizo proved to be exceptionally, almost shockingly lean. I ended up having to supplement the meager drippings with olive oil anyway.

The most arduous part of the recipe proved to be chopping all the vegetables and herbs, as my trusty immersion blender made the puréeing process relatively painless. It was still more effort than I would want to expend on getting dinner on getting dinner on the table on a week night, but it was a worthy weekend project.

The chorizo definitely made this dish; without it, the soup would have been fairly bland and uninteresting. In fact, discovering the quality of the chorizo at our local bodega may have been the most significant thing to come out of this recipe experiment. I'm sure you can look forward to seeing more fresh-chorizo dishes around here in the weeks and months to come!


Creamy White Bean and Chorizo Soup
adapted from Bon Appétit

1 pound dried cannellini or Great Northern beans (generous 2 cups)
8 cups water
3 tablespoons extra-virgin olive oil, divided
3 garlic cloves; 1 smashed, 2 chopped
1 large fresh rosemary sprig
1 bay leaf
1 large onion, coarsely chopped (about 2 cups)
1 large carrot, coarsely chopped (about 1 cup)
1 large celery stalk, coarsely chopped (about 3/4 cup)
2 1/2 teaspoons finely chopped fresh thyme, divided
4 c. chicken broth
1 pound fresh chorizo link sausages, casings removed
1/4 c. whipping cream

Place beans in heavy large saucepan. Add enough water to pan to cover beans by 4 inches. Let beans soak overnight at room temperature.

Drain and rinse beans; return to same saucepan. Add 8 cups water, 1 tablespoon oil, smashed garlic clove, rosemary, and bay leaf. Bring to boil. Reduce heat to medium-low, partially cover, and simmer until beans are just tender, 1 to 1 1/2 hours. Season to taste with salt.

Drain beans, reserving cooking liquid. Discard rosemary sprig and bay leaf.

Heat remaining 2 tablespoons oil in heavy large pot over medium heat. Add onion, carrot, and celery. Sprinkle with salt and pepper. Sauté until vegetables are beginning to soften, about 10 minutes. Add chopped garlic and 1 teaspoon thyme; sauté 2 minutes. Add 2 cups reserved bean cooking liquid, 4 cups chicken broth, and beans. Bring to boil; reduce heat to medium and simmer uncovered until vegetables are tender, about 25 minutes. Cool soup 10 minutes.

Meanwhile, sauté chorizo in heavy large skillet over medium-high heat until cooked through, breaking up lumps with back of spoon, about 5 minutes. Transfer chorizo to paper towels to drain.

Using slotted spoon, remove 1 1/2 cups bean mixture from soup; reserve. Working in batches, puree remaining soup in blender until smooth. Return puree to pot. Stir in reserved whole-bean mixture, remaining 1 1/2 teaspoons thyme, chorizo, and cream. Season with salt and pepper to taste, and serve.

3.16.2013

Dip It Low...

In the past, I have discussed how I have recently come to terms with being an extrovert, meaning that I draw energy from being around others, and do not enjoy being alone. This is why, though the rational half of my brain understands that it is good for Justin's career to pick up extra shifts on the weekends at a public library and keep up-to-date experience in that field on his résumé, I do not relish the fact that he takes the car with him and leaves me alone all day on the weekends.

To keep myself distracted and cut down on the feelings of despondency and boredom that accompany solitude for me, I try to stay as busy as possible on the unfortunate Saturdays when Justin is working,and I usually treat these days as an opportunity to scratch chores off my to-do list, catch up on the multitude of television shows that I TiVo but don't have time for during the week, and to tackle involved projects in the kitchen.

This week, however, our house was already relatively clean, we had leftovers we needed to eat, including enough leftover ice cream pie to make baking a wasteful option, and enough shows were on reruns that I had nothing to watch. I managed to talk Dad into having lunch with me as a pitstop on his way back to the burbs after picking up some papers downtown, but I was still desperate for something to keep my mind occupied.

Naturally, I turned once more to my Pinterest board, where I spotted a bean dip I could make using ingredients I already had on hand, including some of the rosemary leftover from last night's ditalini with chickpeas that wasn't going to stay good forever. Plus, given Justin's fondness for legumes, I figured I couldn't go wrong.

I ended up with only two complaints about this recipe: first, it was so quick and easy to make that it hardly helped me kill anytime at all, and second, it didn't make nearly enough dip. It was so good, that once Justin arrived home from work with the bag of pita chips I'd asked him to pick up, we polished off the dip much too quickly.

In the future, I would double this recipe if I were making it for just the two of us, and maybe even triple it if we were entertaining guests. (I've changed the recipe below to reflect this.) Lately, we've been making our quickly-becoming-legendary spicy Moroccan carrot dip whenever we have people over, but it will be nice to have something simpler in our arsenal, as that recipe is rather labor-intensive, even if people do love it.

I actually prefer this new bean dip, as the flavor profile is more in line with my palate. I'm glad we gave it a try, and I look forward to using it as a disposal mechanism for more leftover rosemary in our future.


Rosemary Lemon White Bean Dip
adapted from Serious Eats

2 15.5 oz cans cannellini beans, drained and rinsed
4 medium cloves garlic, peeled
1 tablespoon plus 1 teaspoon freshly squeezed lemon juice and 2 teaspoons finely grated lemon zest from 1 lemon
1/2 c. extra virgin olive oil
1 tablespoons plus 1 teaspoon finely minced fresh rosemary
Kosher salt and freshly ground black pepper

1. Place beans, garlic, and lemon juice in the workbowl of a food processor fitted with a steel blade. Pulse until beans are roughly chopped.
2. With motor running, slowly pour 1/2 cup of oil through feed tube. Process until mixture is smooth.
3. Transfer bean mixture to a small bowl. Stir in rosemary and lemon zest. Season with salt and pepper to taste. Serve immediately or store in an airtight container in the refrigerator for up to 3 days.

3.15.2013

Chickpeas: Neither Chick Nor Pea: Discuss...

In our house, I am solely responsible for planning our meals, as well as planning the grocery runs that make them possible. I sit down every Thursday or Friday and look at the store ads online to see what the best bargains are for the week. Then, I conduct a mental (and sometimes physical inventory of the fridge, and what ingredients need to be utilized in short order. Next, peruse my Pinterest boards to see what new recipes I could try that best combine items that are on sale with items we already have, and finally, I write down a list of what ingredients we need to buy.

Given that all this decision-making falls on me, it would be easy to abuse this power and impose my culinary vision on Justin however I see fit. I could easily eliminate ingredients from our diet that don't appeal to me, but for the most part, I strive to make my kitchen dictatorship a benevolent one.

This is why I decided to include a variation on pasta e ceci, or pasta with chickpeas, a classic Italian pairing, in this week's meal rotation. I've never been much of a fan of the legume, in fact, I eschewed eating hummus at all until the past couple years or so, but my beloved loves chickpeas almost as much as he loves me.

I think he also loved this recipe because he was able to do almost all the chopping in the food processor, which is a huge time-saver compared to the usual recipes I request him to make that require lots of meticulous chopping my hand. (It was truly a stroke of tremendous foresight to have signed us up for that knife skills class back in the early days of our relationship!) 

It did have an added step, in the form of creating a garlic and rosemary-infused olive oil to drizzle over the top of the finished dish, but we felt that the effort-to-result ration was skewed in its favor -- it really brought something special to the dish, and rescued it from being bland. As for me, I felt that the starch-on-starch of the beans with the pasta was a little much for me, though the chickpeas maintained their texture surprisingly well. For a non-chickpea lover, this wasn't actually a good thing, but the dish benefited from having a bit of textural contrast, even if I was left longing for some meat, or nuts, or really anything besides the garbanzos.

Still, Justin really liked this dish, so I'll be sure to incorporate it into our future meal planning. After all, I'm always on the lookout for something to do with the giant seven pound cans of chickpeas he buys from a nearby ethnic grocery store. A girl can only eat so much hummus, and even if I'm not super enthusiastic about this dish, it could be a welcome change of pace...


Ditalini with Chickpeas and and Garlic-Rosemary Oil
adapted from Bon Appétit

1 medium onion, quartered
1 medium carrot, peeled, cut into 1-inch pieces
1 celery stalk, cut into 1-inch pieces
6 garlic cloves, 4 whole, 2 chopped
1/2 cup flat-leaf parsley leaves
1/4 teaspoon crushed red pepper flakes
1/2 cup olive oil, divided
Kosher salt
2 tablespoons tomato paste
2 15-ounce cans chickpeas, rinsed
1 pound ditalini or elbow macaroni
1 tablespoon chopped fresh rosemary

1. Pulse onion, carrot, celery, whole garlic cloves, parsley, and red pepper flakes in a food processor until finely chopped; transfer to a small bowl and set aside. Wipe out food processor bowl and set aside.
2. Heat 1/4 cup oil in a large heavy pot over medium heat; add reserved vegetable mixture, season with salt, and cook, stirring often, until golden, 8-10 minutes. Stir tomato paste and 1 cup water in a small bowl to combine; add to pot. Cook, scraping up any browned bits from bottom of pot. Bring to a boil, reduce heat, and simmer until liquid has almost evaporated, 5-8 minutes.
3. Add chickpeas and 2 cups water to pot and simmer for 15 minutes to let flavors meld. Transfer 1 cup chickpea mixture to food processor; purée until smooth, then stir back into sauce to thicken.
4. Meanwhile, cook pasta in a large pot of boiling salted water, stirring occasionally, until al dente. Drain pasta, reserving 1 1/2 cups pasta cooking liquid.
5. Add pasta and 1/2 cup pasta cooking liquid to sauce and stir to coat. Increase heat to medium and continue stirring, adding more pasta cooking liquid as needed, until sauce coats pasta.
6. Heat remaining 1/4 cup oil in a small sauce­pan over medium-low heat; add chopped garlic and rosemary and cook until sizzling stops, about 1 minute. Divide pasta among bowls and drizzle with garlic-rosemary oil.

3.10.2013

You Gotta Roll With It...

Overall, I am really very thankful to be gainfully employed once more. I was incredibly fortunate to be without a job for such a short period of time, and I like my new situation. I am learning all kinds of skills that will serve me well in the long-run, plus I work with great people who are positive and create a healthy work environment. That said, I am going through a bit of a stressful patch. I am juggling multiple projects, nearly all of them are in a highly active phase, and deadlines are flying at me at an alarmingly fast rate.

This weekend, I've been putting in extra hours from home trying to make some headway on a particularly large project with a looming deadline, and as a result, I felt a bit of a need to treat myself for my efforts. Baking has long been a source of stress-relief for me, and chocolate has always been a handy emotional salve for me, so I turned to my Pinterest board in search of a chocolate-focused baking project I could tackle to make myself feel better.

Inspiration came in the form of a chocolate-swirled breakfast roll from Smitten Kitchen, based on the chocolate babka that she had eaten growing up. Though babka is associated with Eastern European Jewish communities, and I was raised in a predominately Jewish suburb, babka was never really a part of my childhood. Still the concept was appealing -- rich, buttery, brioche-style yeast dough, swirled with sweet chocolate and cinnamon streusel. I love cinnamon buns, I love chocolate, and l love chocolate and cinnamon together, so the idea of combining all these elements and getting to call them breakfast was an undeniably attractive prospect.

The recipe turned out to be a bit more labor-intensive than I probably should have tried to attempt during a weekend when I was already so busy, but attending to the dough throughout its various stages also provided a welcome distraction. Though our apartment is generally on the chilly side during the coder months of the year (and a nightmare to air-condition sufficiently in the summer), the yeast did its job without incident.

As instructed, I rolled out the dough as thinly as possible to allow for maximum chocolate dispersion, but I do think that this strategy resulting in blurring the distinct striations between dough and filling that create a characteristic swirled bun. Chocolate was definitely the dominant flavor in the rolls, eclipsing the cinnamon, though I didn't much mind.

Overall, these babka-inspired buns were a decadent breakfast indulgence, and while I don't think they would be appropriate for regular consumption, from both a caloric and effort-expenditure perspective, I did enjoy the process of making them, and even more the chance to eat them when I was done.

3.06.2013

Read My Mind...

Justin has been working a lot of weekends lately, filling in at the public library where he used to work before he got his full-time job, and when he heads up to the burbs for the day, he takes the car with him. As a result, I've been spending a lot of time around the house these last several Saturdays and that means one thing: I've been watching a lot of cooking shows on PBS. As I've mentioned in the past, watching the Saturday cooking show line-up on WTTW is something of a habit of mine, and since the recent debut of their new show The Mind of a Chef, my interest is even greater.

I started watching the program solely based on the fact that Anthony Bourdain narrates it (though he very seldom appears in the flesh), and I've been a huge fan of his shows and writings for years. Being both a foodie and a former historian,  I found that I really enjoyed The Mind of a Chef's fusion of food theory, ingredient history, and travel features. Plus, there was something very charming about the star, Chef David Chang's giddy enthusiasm for his craft.

Naturally, I found that the segments that inspired me the most were those featuring Chang's pastry chef, Christina Tosi, whom I watched week after week taking innovative approaches to dessert, until I finally couldn't take any more. I had Justin pick up a copy from her book from the library while he was there, and I started eagerly flipping through the pages of Momofuku Milk Bar.

By reading the book, it is easy to see that it was written by a pastry chef and not a cookbook author writing for the average home chef. Momofuku Milk Bar is structured around the concept of "mother recipes" which you make and then transform into other desserts by adding more components. This approach makes total sense if you are working in a commercial kitchen, where you can make a huge batch of say, liquid cheesecake filling, and then save time by turning it into ice cream, pie filling, cake filling, et cetera.

If you are a home cook, however, it is a little daunting to read a recipe for a cake, for example, that includes five or six nested recipes within it. Tosi's thought processes are interesting, to be sure, and the desserts look delicious, but very few of them are practical, especially because they also tend to call for ingredients that are either expensive to purchase in small, retail-size quantities instead of wholesale, or simply because there is little else the average home cook could do with them.

As you might have guessed, I still didn't let that stop me. I was determined to try at least one recipe from Tosi's book, even if it meant dedicating a significant amount of time to sourcing ingredients. I selected one of the more simple recipes in the book, for corn cookies, which I had watched her make on The Mind of a Chef, and then subsequently turn into a pie crust. Though corn may sound unorthodox at first in a dessert, the Italians have been puttin polenta in their cookies for ages, and cornbread (at least in the North), can have a significant sweet component, so I was willing to give it a chance.

I ended up dedicating the better part of an afternoon to locating the two specialty ingredients in the recipe - corn flour and freeze-dried corn, and ended up traveling to three different stores. I really thought I'd find the corn products at Whole Foods, so I went there first, but I was surprised to find neither. I did, however, find the Plugra brand imported butter recommended by Tosi, and though I was originally planning on just using the unsalted butter I had on hand, I opted to buy the expensive Plugra just to justify my trip to Whole Foods.

Next, I tried Jewel, a local mega-mart, thinking I might find the freeze-dried corn there, because I remembered that they once carried a line of freeze-dried fruit and veggies there for snacking and salad-topping, but discovered they no longer carried the brand. I did, however, stop in the organic aisle, where I was shocked to see corn flour on the shelf, where Whole Foods had failed to stock it.

I was at a loss, however, on the freeze-dried corn, so I Googled it, figuring I'd have to order some online. After all, in Tosi's own words, "Amazon is your friend." However, one of the top hits was for The Spice House, a spice and specialty food shop, which just happens to have a brick-and-mortar store in Evanston, the closest suburb to my house. I called ahead before driving there just to confirm that they had it in the store, and soon, I was in business.

After locating everything I needed, the hard part was over. Though grinding the freeze-dried corn down to a fine powder in the food processor was an extra step not required by most cookie recipes, the cookies were actually fairly straight-forward. I made sure to follow all of Tosi's instructions to the letter, even when I thought they were borderline ridiculous, which included creaming my butter and sugar together for nearly ten minutes before adding the dry ingredients. Tosi claims that this step is critical and really does make a difference, so I indulged her, even though I don't think I've ever creamed for that long before in my entire cookie baking career.

I also dutifully scooped out the dough in the exact size that Tosi specified, and refrigerated the prepared dough overnight to ensure perfect results. Her recipe called for 2 3/4 ounce cookies, which may seem large, but is only a scant 1/8 ounce larger than my beloved chocolate chip cookie recipe, so I was ready to get on board with her there. It does produce big cookies, but they are large enough that you feel satisfied eating just one, and don't end up justifying several small cookies to yourself instead.

In the end, the cookies turned out magnificently. They were golden yellow in color, almost like the unusual saffron snickerdoodles I made last year, but unlike those, their flavor was not nearly as polarizing. The corn flavor is subtle; if you didn't know what it was, you might not be able to identify it. It just adds a lovely depth of flavor and complexity to a cookie that is delightfully crisp on the outside and chewy in the center -- just the way I like them. They were also fantastically buttery. Plugra has only 2% more butterfat and less water compared to standard American butter, but Tosi was right again, that 2% makes a difference!

Justin even went so far as to procliam them a new favorite, or at least certainly in the pantheon of his favorite cookie recipes that I have made while we've been together. As for me, I'm relieved that they turned out so well, after chasing down all the ingredients. Plus, I will be happy to use up the leftovers to repeat this recipe in the future.

Now that Tosi has proven herself to me, I foresee myself doing more specialty shopping in the future, as the rest of the cookies in Momofuku Milk Bar are looking pretty good right about now...


Corn Cookies
adapted from Momofuku Milk Bar

225 g unsalted butter, at room temperature (preferably Plugra)
300 g sugar
1 egg
225 g flour
45 g corn flour
65 g freeze-dried corn, ground into powder
3 g baking powder
1.5 g baking soda
6 g kosher salt

1. Combine the butter and sugar in the bowl of a stand mixer fitted with the paddle attachment and cream together on medium-high for 2-3 minutes. Scrape down the sides of the bowl add the egg, and beat for 7-8 minutes more.
2. Reduce the mixer speed to low and add the flour, corn flour, corn powder, baking powder, baking soda, and salt. Mix until the dough just comes together, no longer than 1 minute. Scrape down the sides of the bowl.
3. Using a 2 3/4 oz. ice cream scoop, or 1/3 cup measure, portion out the dough onto a parchment-lined sheet pan. Pat the tops of the cookie dough domes flat. Wrap the sheet pan tightly in plastic wrap and refrigerate for at least 1 hour, or up to 1 week. Do not bake your cookies from room temperature -- they will not bake properly.
4. Preheat the oven to 350.
5. Arrange the chilled dough a minimum of 4 inches apart on parchment or Silpat-lined sheet pans. Bake for 18 minutes. The cookies will puff, crackle, and spread. After 18 minutes, they should be faintly browned on the edges yet still bright yellow in the center; give them an extra minute if not.
6. Cool the cookies completely on the sheet pans before transferring to a plate or airtight container for storage. At room temperature, the cookies will keep fresh for 5 days; in the freezer, they will keep for 1 month.

3.05.2013

Bowling for Soup...

Remember back when I said we'd been having a mild winter, and how we had broken a record for lack of snowfall? Well, here we are in March now, and winter is now in full swing. In the last month, we've had enough snow that we are within a couple inches of the 30-inch average for Chicago for any given winter season. We still got all our snow, it just came late, and all at once!

In fact, today we are experiencing yet another bout of snow, and the forecasts are predicting it will be the biggest storm of the season. Flights were cancelled, schools were closed, and employers sent their staff home early. Actually, Justin's office closed early, but my intrepid boss was determined to achieve maximum productivity for the day, so we were not released ahead of schedule.

Since he was home so much earlier, Justin got a head start on dinner, so that I could come in from the cold and have a piping hot bowl of soup waiting for me. I had planned for a Spanish lentil soup for this evening, from a recipe I spotted in the most recent issue of Cook's Illustrated. Normally, I don't attempt to make a recipe so soon after I see it in that particular publication, either because it is too labor intensive or it calls for an ingredient that is too hard to find. In fact, this little video is probably the most accurate description I've ever seen of Cook's Illustrated:


However, this particular dish seemed so manageable, I thought it could even be tackled on a work night. French lentils can be hard to find, but I actually had a surplus in my pantry, after inadvertently buying too many at Whole Foods, thinking I was running low when I was actually fully-stocked. And although Spanish chorizo is surprisingly difficult to find in Chicago, despite its trendiness, I remembered seeing it at Publican Quality Meats during one of my previous visits, so entering this soup into our meal plan would give me an excuse to treat myself to lunch. It seemed like a win-win.

Justin didn't seem to have any trouble with the recipe, other than that the grease from the chorizo created a somewhat unfortunate oil slick on top of the broth. We were also short a carrot, but it didn't seem to affect the taste noticeably.

In fact, the soup turned out very well indeed. It was spicier than I was expecting, which I can probably attribute to either the PQM chorizo, or the smoked paprika I was able to find at the grocery store, which didn't state it's strength on the bottle. Either way, the kick was an unanticipated bonus.

I actually think I liked this lentil soup more than the one we made back in January, and I though that one had become my new go- to recipe at the time. Perhaps my enjoyment of this soup is a testament to the importance of high quality ingredients, after all, that chorizo set me back about $9 per pound, and the recipe called for a pound and a half worth. I usually pay less than a third of that price for Italian sausage at the local mega-mart, but it has never made such a memorable impact on a dish I've made either.

Due to the expense, I'm not sure this dish will become a standard in our home, even though it was simple and relatively quick to make. I'll definitely keep in mind for a special occasion, however, or if we are entertaining guests for dinner. Unfortunately, I'm not going to be able to share this recipe with you because Cook's Illustrated has a vigorous legal team out there protecting their intellectual property. If you are interested in trying this one at home, you'll have to run out to the nearest newsstand and buy yourself a hard copy while they are still on shelves...

3.02.2013

Variety Is The Spice Of Life...

When I interviewed for my job, the CEO explained to me that his work philosophy runs something like: "If it ain't broke, break it, enjoy the mess you've made, then put things back together in the most cost-effective and efficient manner possible." When he asked me if I could get on board with that, I said yes, and gave an example in the form of my approach to cooking. Even if I have an amazing recipe for a given dish (I believe I used brownies in my response, because it was the first thing to pop into my head, even though I've never had a brownie recipe that I was really satisfied with), I am always willing to try a different recipe, because there might be a new tip, trick, technique, or ingredient that will make my food that much better. I never rest on my laurels.

Needless to say, I got the job, and I continue to refuse to leave well-enough alone in my kitchen as well. Just last night, I tested a new stir-fry recipe, despite the fact that I have an incredible recipe for a beef and snow pea stir-fry that I have happily made over and over since we discovered it last year. Good as that one was, this one called for different vegetables, and I thought it might make for a nice change of pace.

Though it featured Brussels sprouts, which are far from being one of Justin's favorites, the dish also called for chiles and carrots, which I thought might appeal to him, in light of the fact that one of his main criticisms of our existing stir-fry routine is that it would be improved by the addition of more vegetables. I wasn't crazy about the thought of chiles, even though I don't mind spicy food all that much, but I figured I could always pick them out.

In terms of effort, I think this recipe was actually slightly less work despite the need to meticulously chop more veggies since it did not require the pan-frying of any noodles. That being said, those crispy, golden brown and delicious noodles are worth every extra moment of work and make our usual stir-fry the treat that it is. This one felt dull by comparison.

Plus, I did not care for the sauce in this new version. This version features rice vinegar, which was a bit too tart my palate. Each bite did not leave me craving the next, but rather indifferent to it. I had to compel myself to finish my plate so I wouldn't be hungry again later.

Really, the best part of the meal were the Brussels sprouts, and I can think of any number of ways I would rather eat those. For now, we will most definitely be sticking with our tried-and-true stir-fry favorite, but at least I can rest assured that it is the top recipe out there. There is no room for mediocre dishes in my repertoire.


Brussels Sprout and Steak Stir-Fry
adapted from Bon Appétit

3 tablespoons oyster sauce
3 tablespoons soy sauce
2 tablespoons unseasoned rice vinegar
4 tablespoons vegetable oil, divided
1 pound Brussels sprouts, halved
8 oz. flank or skirt steak, thinly sliced against the grain
Kosher salt
4 scallions, whites chopped, greens sliced
3 garlic cloves, sliced
2 tablespoons chopped peeled ginger
2 medium carrots, peeled, thinly sliced on a diagonal
1 Fresno chile or jalapeño, sliced into rings
Steamed rice (for serving)

Whisk oyster sauce, soy sauce, vinegar, and 1/4 cup water in a small bowl; set sauce aside.

Heat 2 tablespoons oil in a large skillet over medium-high heat. Add brussels sprouts and cook, tossing occasionally, until golden brown, about 4 minutes. Cover and cook until crisp-tender, about 3 minutes longer. Transfer to a plate; wipe out skillet.

Season steak with salt. Heat 1 tablespoon oil in same skillet over high heat until just beginning to smoke. Add steak in a single layer; cook until browned, about 3 minutes. Turn and cook until nearly cooked through, about 30 seconds. Add to brussels sprouts.

Heat remaining 1 tablespoon oil in same skillet. Add scallion whites, garlic, and ginger and stir until fragrant, about 1 minute, adjusting heat as needed. Add carrots and chile and cook, tossing occasionally, until carrots are slightly softened, about 2 minutes.

Return brussels sprouts and steak to skillet and add reserved sauce. Cook, tossing occasionally, until sauce is thickened, about 3 minutes. Serve with steamed rice and garnish with scallion greens.

2.28.2013

Curiouser and Curiouser...

It should come as no surprise by now that my curiosity regarding new foods and ingredients is relatively boundless. If I could have infinite storage space in my kitchen, I would inevitable fill every corner of that infinite space with odds and ends of bottles, boxes, cans, and bags of ingredients that I purchased because I wanted to see what they would be like, but never used again past the initial recipe that sparked my curiosity. After all, not every experiment is a success, and even recipes that are successful, like the posole I made when we first moved into our new apartment, leave leftover specialty ingredients like dried chiles that have no immediately obvious alternate application.

Still, I remain undeterred. When I saw a recipe for a British dessert relatively unknown here in the U.S. called "flapjacks" (no, they have nothing to do with pancakes besides being flat), I was intrigued despite the fact that it called for Lyle's Golden Syrup. Golden syrup is a form of inverted sugar, similar to honey in appearance and its mild flavor profile, but more related to molasses in terms of how it is produced. It is a popular sweetener in the U.K., but to find it here you usually have to track it down at an import store, unless you live near an exceptionally well-stocked mega-mart.

I set out to find some so that I could give these alternative flapjacks a try, and my search eventually led me to Fox and Obel, purveyors of all things gourmet and obscure, and a dangerous place for my pocketbook if ever there was one. Of course, they carried it and I brought home a bottle (along with several other pricey items I didn't really need), but it lingered on the shelves of my pantry for a while before I finally had the time and inclination to try the recipe.

Last weekend, I was bitten by the baking bug, and had skimmed my Pinterest board in search of something new to scratch off my to-do list. Unfortunately for me, there seem to be a lot of layer cake ideas there, which was more than I wanted to tackle without a specific occasion in mind, and every single other recipe that caught my eye required some ingredient that I didn't have in the house. It was a Saturday and Justin had taken the car to work in the burbs at his part-time job, so I was stuck in the house with nothing to bake. I was especially bummed that we were low on oats after our experiment with pumpkin oatmeal last month, because the flapjack recipe was suddenly, and strongly calling to me.

Though it was getting late in the month, I still hadn't baked a cookie recipe yet for February and I wanted to stay somewhat on course in terms of fulfilling my New Year's resolution. Flapjacks are kind of like a bar cookie, though I think they have more in common with Rice Krispie treats, which I wouldn't exactly classify as a cookie. Still, it was close enough for me.

So tonight, while we were out doing our weekly grocery shopping, I tossed a canister of Quaker Oats in my cart, and I was in business. Thankfully, like Rice Krispie treats, flapjacks are so quick and simple to make that I was able to tackle them on the same night that we went grocery shopping, and still make it to bed on time. You have to love a dessert that can be made in less than an hour!

Convenience means nothing, however, if the result is lackluster. Thankfully, these humble bars more than delivered in the flavor department. In fact, they were astonishingly good! The brown sugar and golden syrup conspired to add complex, caramel notes to the flapjacks, while the oats gained a rich, toasty flavor from their time in the oven. Justin and I easily could have eaten the whole pan, but we limited ourselves to one a piece. 

Now my conundrum is this: do I include the flapjack in my cookie lineup later this year? They are certainly delicious and unusual enough to merit inclusion. But are they really a cookie? At least I have ten months to think about it, and in the meantime, I strongly suspect that flapjacks will be making another appearance or two in my kitchen to help me figure it out.


British Flapjacks
adapted from Bon Appétit

1/2 cup (1 stick) unsalted butter, cut into 8 pieces
1/2 cup (packed) golden brown sugar
1/4 cup golden syrup*
2 1/3 cups quick-cooking oats (not instant or old-fashioned)
Pinch of salt

Preheat oven to 350°F.

Butter 8x8x2-inch metal baking pan. Combine first 3 ingredients in heavy medium saucepan. Stir constantly over medium-low heat until butter melts, sugar dissolves, and mixture is smooth. Remove from heat. Add oats and salt; stir until coated. Transfer mixture to prepared pan and spread out in even layer.

Bake until top is golden (edges will be darker), about 25 minutes. Cool in pan on rack 5 minutes. Cut into 4 squares; cut each into 4 triangles (mixture will still be soft). Cool completely in pan before serving.

2.22.2013

You've Got A Friend In Me...

I am not a person who needs an excuse to bake; I will bake when I am feeling bored, when I need an outlet for stress, or just because. Having a purpose behind my hobby can make for a nice change of pace though. There is something to be said for the unique satisfaction that comes from baking a cake for someone's birthday, for example, or to wow some dinner guests. Hence, it should come as no surprise that when Jess asked for my help in making a lemon meringue pie for her mother's birthday, I enthusiastically volunteered my services.

Evidently, lemon meringue pie is Jess' mom's favorite dessert, and Jess had never made one, so she turned to me because I have more baking experience. I didn't let the fact that I've never made a lemon meringue pie stop me from offering to help, since I'm always looking to expand my culinary skill set. Besides, I'd made lemon curd before, for the masterpiece of a birthday cake I made for Justin's birthday back in 2011, I've had a few experiences with making meringue, and I've perfected the art of pie crust. How hard could it be to fuse all three elements? Plus, I don't even like lemon meringue pie, so giving Jess a hand would give me the opportunity to try out a recipe I wouldn't have experimented with otherwise.

Initially, I had planned to have Jess over to bake a practice pie, and then send her off on her own to make the actual birthday pie. The more I thought about it, however, I realized that Jess wouldn't have the proper tools in her kitchen to replicate the recipe in her own kitchen. Friends don't let friends hand whip egg whites to stiff peaks for a meringue, so I decided to cut out the extra step and just invite her over to make the final pie together.

For the crust, I turned to my trusted Cook's Illustrated recipe, and luckily for me, I found a pie crust all ready to go in my freezer, so I didn't even have to make a new one. (This whole freezer inventory thing is really paying off!) For the rest of the pie, I turned to Alton Brown, after happening to catch an rerun of Good Eats recently on the subject of lemon meringue pie. It seemed like a good enough starting point, so I opted not to look further.

With a sous chef in the kitchen, making the pie went much faster than I would have expected. Jess was in charge of juicing the lemons and carefully whisking together the water, corn starch, and sugar base for the lemon curd so as not to create lumps. I rolled out the pie crust and transfered it to the pan, and worked on separating all the eggs. Since I have more experience with making custards from all those ice creams I've tried over the years, I handled the tempering of the egg yolks, but then moved over to monitor the meringue while Jess took over the lemon curd. All in all, I was shocked by how quickly it all came together, and how simple everything felt, but that could just be the effect of the confidence I've built in my skills over the years.

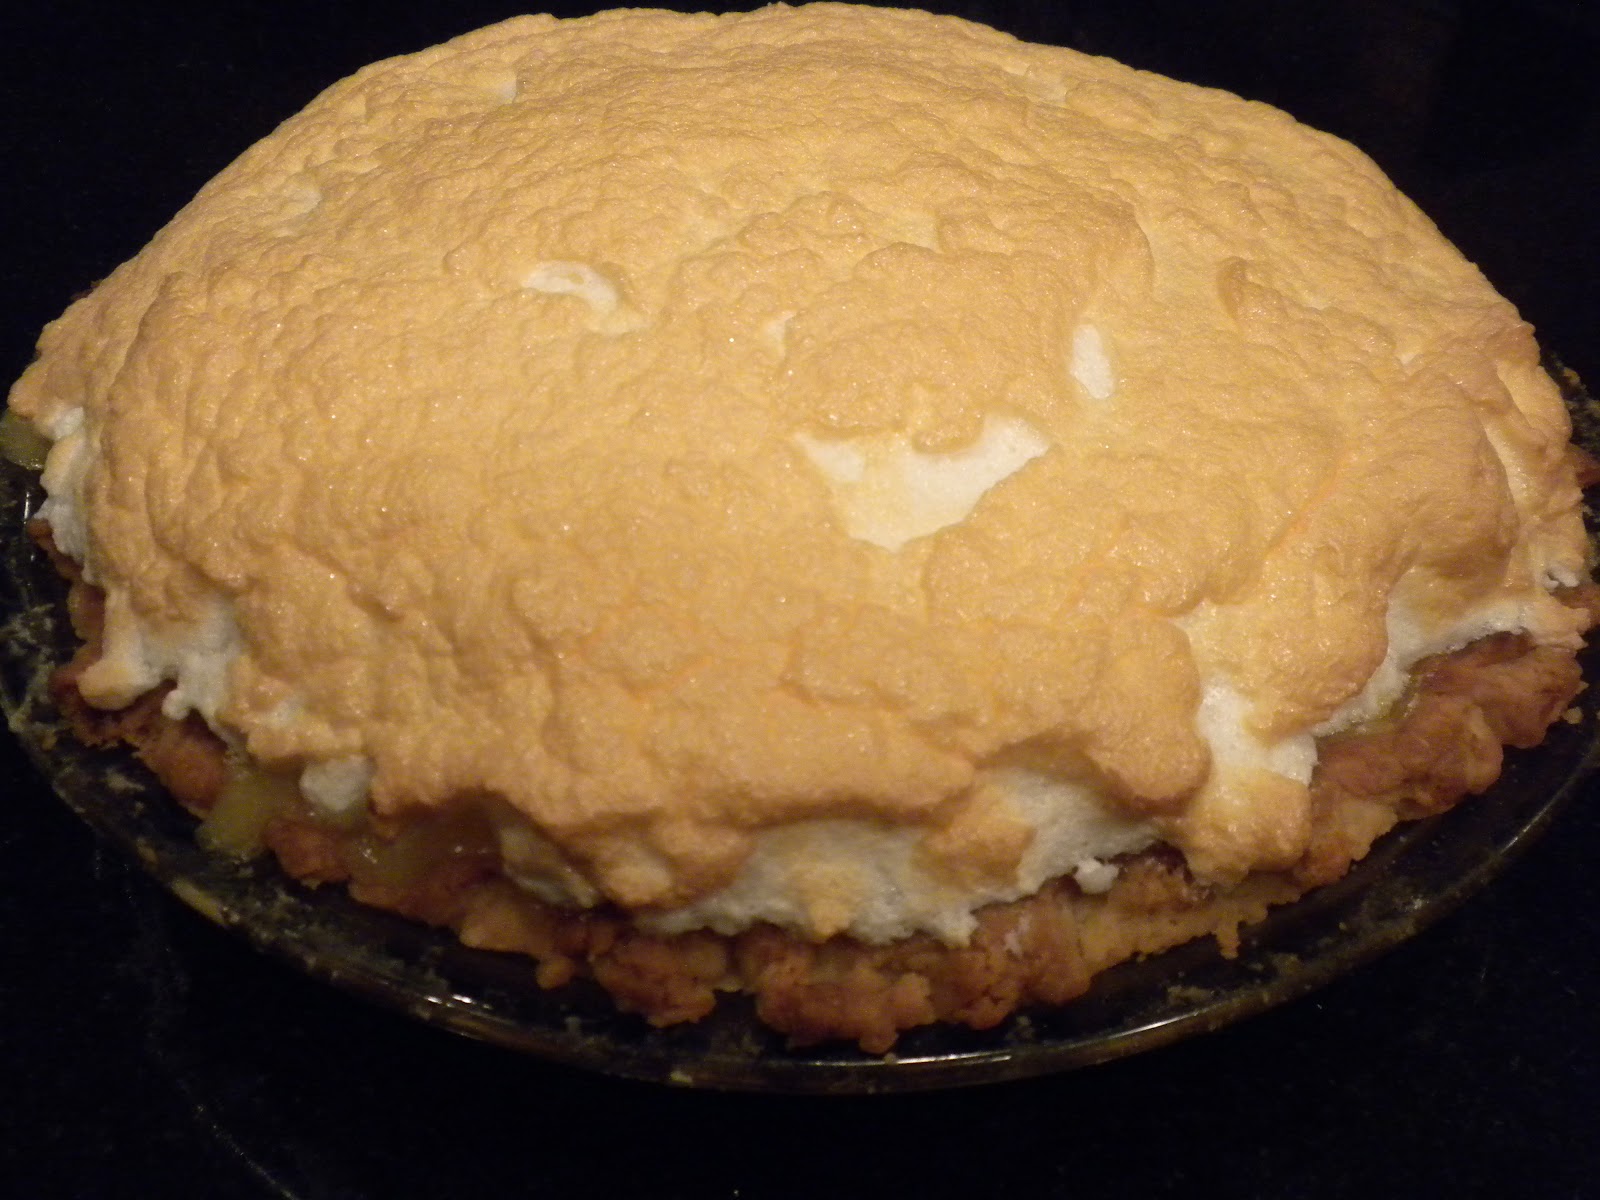
I did have trouble getting the meringue on top of the pie, as the instructions said to do it while the lemon curd was still warm, and it would ooze out of the crust with the slightest application of pressure. As a result, I couldn't get the topping to create the lovely swoops and swirls that one typically associates with the dish, but Jess reassured me, promising that, "If it looked too perfect, no one would believe that I helped!"


The pie was perfectly golden brown when it emerged from the oven, but it was still very wobbly. I was very concerned about how Jess would manage getting it home, especially since she had taken the bus to us instead of driving. She promised to take a cab home, but I was still very leery. I really should have just asked Justin to drive her home (I don't drive in the dark unless it's an emergency because I don't see well at night), but our car was covered in snow, and I didn't want to volunteer him to go clean it off unless it was his idea.

In the end, my anxiety proved to be well-founded: I got a text from Jess after she got home, saying that the lemon curd had leaked all over the taxi seat, and continued to drip as she walked the short distance to her building. The meringue was intact, but she had lost quite a bit of the filling. I was a little crushed that the pie wasn't perfect for Jess' mom, but hopefully it will still taste fine, and she will be touched by all the effort Jess went through to make it for her.

Even though I didn't get to eat any of it (and wouldn't have wanted to anyway), I still had a great time baking with Jess and helping her surprise her mom. Hopefully, she learned a few things as well that she'll be able to put into practice in her own baking endeavors. Truth be told, however, she is more than welcome to come be my pastry apprentice any day!


Lemon Meringue Pie
adapted from Alton Brown

Lemon Filling:

4 egg yolks (reserve whites for meringue)
1/3 cup cornstarch
1 1/2 cups water
1 1/3 cups sugar
1/4 teaspoon salt
3 tablespoons butter
1/2 cup lemon juice
1 tablespoon finely grated lemon zest
1 (9-inch) pre-baked pie shell
1 recipe Meringue, recipe follows

Preheat oven to 375.

Whisk egg yolks in medium size mixing bowl and set aside.

In a medium saucepan, combine cornstarch, water, sugar, and salt. Whisk to combine. Turn heat on medium and, stirring frequently, bring mixture to a boil. Boil for 1 minute. Remove from heat and gradually, 1 whisk-full at a time, add hot mixture to egg yolks and stir until you have added at least half of the mixture.

Return egg mixture to saucepan, turn heat down to low and cook, stirring constantly, for 1 more minute. Remove from heat and gently stir in butter, lemon juice, and zest until well combined. Pour mixture into pie shell and top with meringue while filling is still hot. Make sure meringue completely covers filling and that it goes right up to the edge of the crust. Bake for 10 to 12 minutes or until meringue is golden. Remove from oven and cool on a wire rack. Make sure pie is cooled completely before slicing.

Meringue Topping:

4 egg whites
1 pinch cream of tartar
2 tablespoons sugar

Place egg whites and cream of tartar in the bowl of a stand mixer fitted with the whisk attachment. Beat egg whites until soft peaks form and then gradually add sugar and continue beating until stiff peaks form, approximately 1 to 2 minutes. Use to top lemon filling.