Pages

10.27.2012

The Monster Mash...

Though I'm not usually the kind of person to go all-out for Halloween, I've been looking for excuses to entertain and have people over, so the holiday seemed like as good an occasion as any to throw a party. Since money is tight right now, it was important for me to keep costs down, which can be challenging when hosting a gathering, especially a themed one. With some creativity, however, and some favors called in from Mom, I was able to decorate my apartment, make myself a costume, and feed my guests on the cheap.

I actually didn't spend a dime on decor for the party, despite the fact that my apartment received a full, ghoulish makeover. Luckily, I was able to borrow everything I needed from Mom, who has a formidable collection of Halloween decorations, leftover from a haunted house she put together for my elementary school almost twenty years ago. Disturbingly realistic severed limbs, heads, skulls, and bones found spots on my bookshelves and along the tops of my kitchen counters. I hung bats from the curtain rods, along with strands of stringy faux moss. Ravens found a perch on top of the vases on our entertainment center, and I rested an owl on top of our cookbook shelf.


Rats and spiders were tucked here and there, along with a particularly giant fake snake that I perched on the towel bar in the guest bathroom. Screams emanated from people who went to relieve themselves all through the night. I used Command adhesive to hang a three dimensional skull and crossbones in our hallway, as well as a skull wreath on the door. A giant, freakish rat was stationed by the fireplace, and a rabid-looking cat became the centerpiece of the dining table.


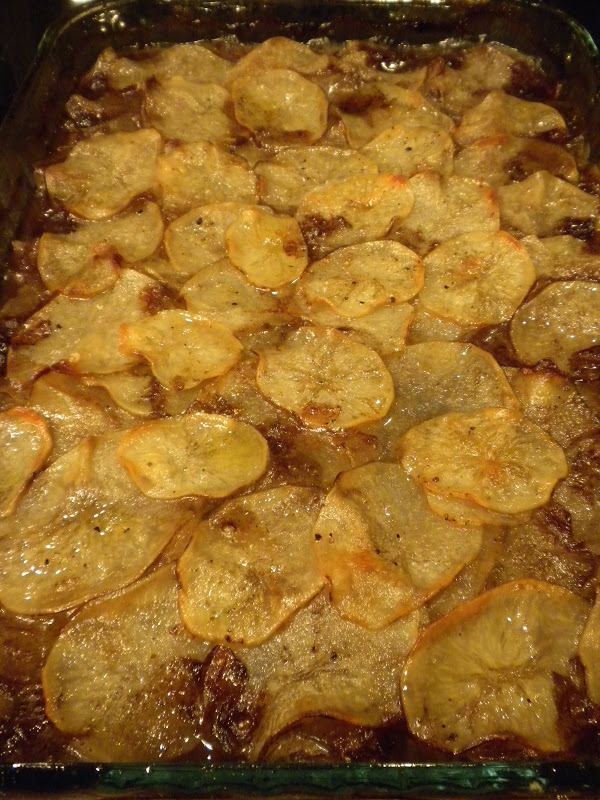
I was even able to decorate the food station, courtesy of the "haunted cafeteria" theme of that long-ago haunted house from grade school -- in among the dips and desserts were a pie baked with severed hands, a rat emerging from a piece of cheese, a pie of eyeball pie, and a human brain on a serving platter. I was a little concerned that these gruesome additions would deter people's appetites, but it didn't seem to stop anyone from devouring the treats.

Amazingly, I managed to make all the food for this party without going over my food budget for the month of October. I accomplished this by sticking mainly to dips instead of warm hors d'oeuvres, and relying on ingredients I already had around the house. My recently discovered Moroccan carrot dip made the cut, not only because it only costs a couple dollars to make, but because it was so well-received by everyone I served it to last time, and it's bright orange color seemed appropriate for Halloween. 

I also had Justin put together a batch of hummus with some leftover canned pumpkin stirred in for some extra Halloween panache. I was able to throw together the pepita brittle and a batch of fudge from ingredients I had on hand, so they were essentially free. The most expensive item on my buffet was guacamole, which I made because it's become a party signature for me this year (even though I can't stand the stuff), and even that cost about $7 for avocados, serrano chilies, and limes.


Though dressing up for Halloween isn't really my thing, I felt obligated, being the hostess and all. So I spent less than $10 to assemble an adorable bat headband I'd spotted on Martha Stewart's website. Because I was able to obtain black construction paper and double stick tape from Mom's supply of crafting materials, all I had to purchase was a new, fabric-wrapped headband, and some thin-gauge wire from Home Depot. I was really pleased how it turned out: the wires were barely visible at times, and it looked like I had a flock of bats just floating over my head.


Justin managed to one-up me in the cheap costume department, by working his wardrobe and borrowing a trench coat from his father in order to make a Tintin costume for free. I was a little worried that it would be too obscure, but pretty much everyone was able to guess who he was.


All things considered, we had a pretty good turnout for our party. I think it's a little easier to get people to come to parties that are during the day, like my Fourth of July party, or my annual cookie exchange, since there is more competition for activities at night, but I was really pleased that my friends were able to come out. The girls seemed go go for the costumes more than the guys, Justin aside, but I was happy to see everyone regardless of what they were wearing.


I think the award for best costume of the night has to go to my friend Jess, and her awesome TARDIS costume inspired by Doctor Who. I've never actually seen the show, but from what I understand, the TARDIS is a sort of time machine/spacecraft that looks like a British police box on the outside, but is much larger on the inside. Jess pulled off the look with a homemade dress with design elements that evoked the windows and color scheme of a police box, complete with a light-up headband to capture the standard light on top of a TARDIS/police box. She looked absolutely adorable!


We were also fortunate to have all three of Justin's sisters in attendance at our fĂȘte, since Cathie just happened to be in town in the midst of completing a move from Colorado to Ohio. Somehow, she managed to assemble a very impressive Black Swan costume from components found in her parents' basement, while Lizzie opted for a Darth Vader look, and Carrie dressed as Regina George from the movie Mean Girls. I suspect that I'll be vacuuming up hair from her wig for weeks, but I was happy to see all of them, and I'm sure that Justin enjoyed getting to spend some quality time with all of his sisters together.


All in all, it was a great night, full of delicious food and fantastic company. I know it was just what I needed to keep my mind off my unemployment predicament, and I'm happy that I was able to provide my friends with a fun evening in the process. I'm already starting to think about my next gathering, my December cookie exchange, and I can't wait to see everyone again. Thanks for coming guys!

10.26.2012

Caution: Fragile...

With Halloween just around the corner, and all the ghouls, goblins, and costumes aside, as any child can tell you, October 31st means only one thing: candy. Hence, when I started putting together a menu for a certain festive gathering that will be happening at our place this weekend, I knew I wanted to include a couple homemade candies, even though sweets never seem to be at the top of anyone's list for snacking while simultaneously consuming alcoholic beverages. It just seemed like the right thing to do, as an homage to all those years spent memorizing which houses had the best candy, and trudging through bitter Chicago weather to go get it.

Choosing what candies I would make was actually fairly easy. Given how successful my first flirtation with candy-making was back when I made that Mexican chocolate fudge, I knew that I wanted to include that in my line-up. I had also been eying a recipe for brittle that swapped out the traditional nuts for pepitas, or the inner kernels of pumpkin seeds. A container of pepitas had been languishing in my freezer from a long-ago baking project, and this brittle was the only tempting recipe I'd found that would finally clear them out. Since Halloween is the holiday for pumpkins in the United States, making pepita brittle to fete the occasion seemed appropriate. And besides, I have been trying to clean out my fridge lately anyway.

Though I was initially more intimidated by making brittle than I was in tackling fudge (I've never quite gotten over my fear of molten sugar ever since I burned myself making caramel once), this particular brittle recipe was actually easier. It didn't call for a candy thermometer, or carefully monitoring the temperature of the candy throughout the cooking process. Instead, I was able to judge everything by look and smell (the more caramel you make, the better you will become at judging its progress based on the scent of toasted sugar), which was a nice change of pace.

I'm not going to lie; the vigorously bubbling cauldron of molten sugar was a little scary, but I wore long sleeves and oven mitts, and mustered some faith in my own skills. The most harrowing part proved to be the pouring of the hot mixture onto parchment paper to cool. I had decided to follow the author's tip and roll the molten candy between two oiled sheets of parchment to achieve a thin, uniform layer, and the candy came perilously close to oozing out onto my counter top. I managed to keep it contained, however, and though the wooden rolling pin became disconcertingly warm, the entire process was over before I knew it.

For a first-timer, this brittle turned out almost shockingly well. It was perfectly crisp, yet not so hard that it hurt your teeth. It also lacked any semblance of stickiness, so there was no need to dig the remnants out of one's molars. My only problem with it was in the pepitas themselves -- I think I'm just not that much of a fan of their flavor. The surrounding brittle was excellent, with hints of burnt sugar and a subtle kick of salt. I just didn't care for the seeds. I will be revisiting this recipe again in the future, without a doubt. However, I think I'll probably go the traditional route, and use nuts; in fact, I'm already planning for when I'll give that a try...


Pepita Brittle
adapted from Smitten Kitchen

Pam, for lining the tray
2 cups sugar
4 ounces (1 stick) salted or unsalted butter
1/3 cup light corn syrup
1/2 teaspoon baking soda
2 teaspoons to 1 1/2 tablespoons coarse or flaky sea salt (use less if you’re using salted butter)
1 1/2 cups of raw, unroasted pepitas (they toast in the syrup) or 12 ounces (3/4 pound) roasted, salted nuts, not chopped

1. Line a 12x16x1/2-inch sheet baking pan with parchment paper and lightly coat it with Pam.
2. Put the sugar, butter, corn syrup, and 1/2 cup plus 2 tablespoons water to a large saucepan, and stir together until all the sugar is wet. Cook over high medium-high, but watch it carefully as it will foam up quite a bit and you might need to dial back the heat to medium until it begins to thicken.
3. Once the mixture turns a medium golden (takes at least 10 minutes) immediately remove from the heat, and carefully whisk in the baking soda followed by the salt (taking care, as the caramel will rise in the pan and bubble some more). Switch to a wooden or metal spoon, and fold in the pepitas or nuts.
4. Quickly pour the mixture onto the sheet pan, and spread it out over the pan using the back of the spoon before it starts to harden. Alternately, you can slide the parchment paper out of the baking pan and onto a counter, cover it with another sheet, and use a rolling pin, pressing down hard, to roll it out as flat and thin as you would like.
5. At this point you can either let it cool completely (pulling off the top sheet of parchment, if you use the rolling pin technique) and break it into bite-size pieces with the back of a knife or other blunt object or, while it is still fairly hot and pliable, cut it into a shape of your choice and let the pieces cool, separated on parchment paper.
6. The brittle can be stored at room temperature, in an airtight container, for up to two weeks. Separate the pieces between layers of parchment or waxed paper, because even a little humidity can cause them to stick together.

10.23.2012

Like A Big Stick Of Butter...

It would appear that nothing is safe from my recent slash-and-burn policy when it comes to my freezer/refrigerator/cabinets. Even ingredients that have a long shelf life are starting to bug me; I just want everything gone. My latest cooking project got started with a carton of heavy cream that was past its expiration date (don't worry, that stuff is ultra-pasteurized, and I've never had any go bad, despite how old it was). There was enough of it that ice cream seemed like the obvious answer, but what kind?

While I was standing in front of the fridge ruminating on the question, my eyes lit on the container of miso that has been taking up space in my fridge for five months. Sure, it's not that big, and it'll be good indefinitely, but it was still so full, and I knew exactly how to use up some of it. You see, for quite some time, I'd been eying an ice cream recipe that featured miso as a secret ingredient.

I know it sounds a little strange, but it was a recipe for butter pecan ice cream, and miso does pair incredibly well with butter. It adds a savory essence that enhances and deepens the flavor of butter, and since I'm kind of a sucker for recipes that include an unexpected ingredient, I was keen to give it a try. 

The description promised that the miso flavor itself would not be noticeable, that it would merely amplify the taste of the butter and pecans. However, once I added the miso to the base, all the lovely nutty aroma of the browned butter (another stroke of genius in this recipe) disappeared, and I was left with the scent of miso. I was concerned, but I persevered. After all, the same thing happened with my chocolate mayonnaise cake, which smelled like something from the deli all the way until it came out of the oven, when it emerged as a decadent, chocolate delight.

My overall anxiety level was not improved when I added the toasted pecans to the freshly churned ice cream, and it started to melt right away. The recipe's suggestion of heating the nuts while the ice cream was churning was clearly a bum steer; they were still warm when they went into the ice cream, and they caused it to melt almost immediately. I was worried that I had effectively undone all the work done by the ice cream machine to aerate the mixture and create smooth, uniform ice crystals that would give the finished product a pleasant mouth feel.

Miraculously, once the ice cream had set up, the texture was flawless. It was neither too dense, too icy, or too hard to scoop. The ice cream itself struck a fantastic balance between sweet and savory, with a generous portion of nuts tossed in for added interest. As promised, the miso flavor receded into the background, however, I'm not sure it did much to increase the buttery taste. To me, though the ice cream was very good, it did not conjure flavor memories of other butter pecan ice cream I've had in the past. It did little satiate the craving I'd been nursing ever since I set about making this recipe.

Nonetheless, it was very good, and certainly a worthy experiment. How many people can say they've made miso ice cream?


Really Buttery Pecan Ice Cream
adapted from Serious Eats
9 tablespoons unsalted butter, divided
1 c. plus 1 tablespoon packed dark brown sugar, divided
3 c. half and half
5 tablespoons shiro miso paste
6 egg yolks
1 tablespoon vanilla extract
1/4 teaspoon cinnamon
1 1/2 c. pecans, chopped
Pinch of salt
1. In a large saucepan, melt 8 tablespoons butter over medium-low heat, cooking until browned bits appear in the pan and a nutty aroma is achieved, then stir in brown sugar. Increase heat to medium-high and cook sugar until it just begins to smell toasted and smokey, 2 to 3 minutes. Add half and half and miso paste, whisking to combine. Bring to a bare simmer, whisking frequently.  
2. While dairy mixture is heating, whisk egg yolks well in a medium bowl. When dairy just begins to bubble, add one third of mixture to yolks, one ladleful at a time, whisking constantly. Then transfer yolk mixture to saucepan and whisk to combine. Reduce heat to low.
3. Cook custard, stirring frequently, until it coats the back of a spoon and a swiped finger leaves a clean line. Remove from heat and whisk in vanilla and cinnamon. Pour through a strainer into an airtight container and chill overnight.
4. Meanwhile, toast pecans in a large saucepan over medium-high heat with remaining tablespoon of butter and brown sugar. Stir frequently and cook until pecans smell toasted and darken slightly in color. Allow to cool to room temperature.
4. Churn the ice cream according to manufacturer's instructions.
5. When ice cream is finished, transfer to a large airtight container or a bowl. Stir in pecans, then transfer to airtight container to chill for 4-5 hours; ice cream will be very soft out of the churn and needs time to set. Stir ice cream well before serving, as pecans may have sunk to the bottom. 

10.20.2012

Heal Thyself...

Sometimes you have to learn how to say, "No." I have been over-scheduled this month; between Justin's birthday, Dan's funeral, our anniversary, running all over the city for Open House Chicago, and the endless grind of searching for and applying for jobs, I needed a break. And since I decided to throw a Halloween party next weekend as part of my initiative to ward off depression through socializing and entertaining, that break was going to have to happen this weekend.

I had been planning on going on a girl's weekend with some of my former coworkers, but what had originally been touted as a low-key retreat seemed to be turning into a wild bacchanal the further planning progressed. I knew I just wasn't up for any more craziness in my life, so I bowed out at the last minute in favor of staying close to home and spending some quality time with Justin. It turned out to be just what we both needed.

Earlier today, Justin and I took a walk around our neighborhood and strolled along the lakefront, stopping for a while to watch the waves and reflect on the fact that we had done the exact same thing on one of our first dates, nearly two years ago to the day. Then tonight, we took some time to make dinner together, something that we don't seem to do much of these days. With me being home during the day now, I either finish dinner before Justin gets home, or he makes it himself after work in order to give me extra time to work on job applications. We don't have many opportunities for collaboration these days, and it was nice to get into the kitchen together.

I had chosen a recipe for pumpkin lasagne for us, not only because both spinach and pasta were on sale at the grocery store but because we had several expired cans of canned pumpkin puree in our cabinet that needed to be used. In a fit of passion for Katherine's pumpkin muffins, I had gotten a bit overzealous in stockpiling pumpkin a few years back, and I wanted to be rid of the expired cans even though their contents were still perfectly edible. Since I already knew that I liked pumpkin as a base for pasta sauce, I figured that it would work equally well in lasagne.

Taking a cue from my old pasta with pumpkin recipe, I decided to add some spicy sausage to this otherwise meatless dish. I know, I know, we've been trying to eat less meat lately, but we've had more than a few random links of Italian sausage floating around our freezer for God-knows-how-long now (somebody forgot to label it with a date), and for the moment, clearing out the freezer is a bigger priority for me than experimenting with vegetarianism.

Ultimately, though the sausage worked well with the other flavors in the dish, I think it would have been equally good without it. The combination of warm, fall spices, with creamy pumpkin and sharp, salty Parmesan was definitely a winner. Two whole pounds of spinach made the dish feel healthy, almost enough so to overlook all the heavy cream and cheese. This was truly a perfect dish for a brisk, October night, even if it made rather a lot of food for two people. For this kind of lazy weekend though, I'm going to count that as a bonus as well -- more leftovers means less cooking, which sounds pretty good to me right now...


Pumpkin Lasagne
adapted from Food and Wine

2 tablespoons olive oil
2 onions, chopped
2 lbs. fresh spinach, chopped
2 1/4 teaspoons salt
1 teaspoon pepper
1 teaspoon dried sage
1/2 teaspoon ground nutmeg
28 oz. canned pumpkin puree
1 1/2 c. heavy cream
1 1/2 c. Parmesan cheese
1/2 c. milk
9 no-boil lasagne noodles (about 6 oz.)
1 tablespoon butter

1. In a large nonstick frying pan, heat the oil over moderately low heat. Add the onions and cook, stirring occasionally, until translucent, about 5 minutes. Increase the heat to moderately high and add the spinach , 1 teaspoon salt, 1/2 teaspoon pepper, 1/2 teaspoon sage, and 1/4 teaspoon nutmeg. Cook, stirring, until the spinach is wilted and no liquid remains in the pan, 5 to 10 minutes. 
2. Heat the oven to 400°. In a medium bowl, mix together 2 cups of the pumpkin, 3/4 cup cream, 1/2 cup Parmesan, and the remaining 1 1/4 teaspoons salt, 1/2 teaspoon pepper, 1/2 teaspoon sage, and 1/4 teaspoon nutmeg. 
3. Pour the milk into an 8-by-12-inch baking dish. Top the milk with one third of the noodles, then spread half the pumpkin mixture over the noodles. Layer half the spinach over the pumpkin and top with a second layer of noodles. Repeat with another layer of pumpkin, spinach, and noodles. Combine the remaining 1 cup of pumpkin and 3/4 cup of cream. Spread the mixture evenly over the top of the lasagne, sprinkle with the remaining 1 cup of Parmesan, and dot with the butter. Cover with aluminum foil and bake for 20 minutes. Uncover and bake until golden, about 15 minutes more.  

10.18.2012

Road to Morocco...

It may be cliché, but one can really never have too many weeknight chicken meals. Chicken is a good source of lean protein, it cooks quickly, and there's frequently a deal on it at the grocery store. Justin and I probably don't eat as much chicken as many people do, just because both of us are a little squeamish about touching it in its raw state, but I've gotten much better about powering through the ick factor than when I first started cooking.

So when I saw an almost absurdly cheap price on boneless, skinless chicken breasts this week, I looked to Pinterest to find a new dish to try. I flirted with a few different ideas, but when I spotted a recipe I'd set aside for a Moroccan spin on mustard chicken, I knew I had struck gold. I must have saved at least half a dozen recipes for meat dishes involving mustard, because I know it's one of Justin's favorite condiments, but when I saw how positively he reacted to the Moroccan-inspired carrot dip I picked out for him as a snack, I thought perhaps the time for this particular recipe had come.

When most people think of Moroccan food, they think of tagines, hearty, spicy stews that are fully of rich meats, exotic spices, and briny preserved fruits and vegetables. This dish, on the other hand, is designed to be simpler and more delicate, which appealed to my sensibilities. It would still have the same warm spices as traditional Moroccan cuisine, and would still be served on a bed of cous cous, but a less overwhelming flavor profile than a classic tagine.

I liked this recipe because it came together quickly and simply, and it was easy to have it on the table by the time Justin walked in the door from work. In terms of flavor, I was reminded of another mustard chicken dish I've been making for years, almost since I first started teaching myself to cook. That dish is actually more complicated, and calls for browning the chicken, then simmering it in a sauce of mustard and heavy cream, and adding grapes for a touch of sweetness and a textural contrast. I found myself missing the textural contrast provided by the grapes in this variation, though I did enjoy the subtle heat of the Moroccan version.

In fact, there was something comforting about the simple combination of chicken, sauce, and pasta. The flavors weren't necessarily familiar, but the texture was reminiscent of any number of homey casseroles I've eaten in my day.

As for Justin, my intuition was correct: he loved this dish, and was psyched by the idea of eating it for lunch tomorrow. Any weeknight dinner that elicits that reaction merits a repeat performance, if you ask me. I can't promise that your significant other/brood of kids will feel the same, but it's certainly worth a try...


Spicy Moroccan Chicken with Mustard
adapted from the Boston Globe

4 boneless, skinless chicken breasts, cut into strips
3 tablespoons Dijon mustard
2 tablespoons tomato paste
3/4 c. chicken broth
3 tablespoons olive oil
1 large onion, finely chopped
1/4 teaspoon cayenne pepper
1/8 teaspoon ground cloves
1/2 c. heavy cream
Cous cous, for serving

1. In a bowl, combine the chicken and mustard. Refrigerate for 1 hour.
2. In another bowl, stir the tomato paste and chicken broth.
3. In a large skillet over medium-high heat, heat the olive oil. Add the onion and cook, stirring often, for 8 minutes. Add the chicken, salt and pepper, cayenne pepper, cloves, and diluted tomato paste. Stir well. Bring to a boil, lower the heat, and cover the pan. Simmer, stirring occasionally, for 20 to 25 minutes or until the chicken is cooked through. Add the cream and stir well. Cook for 2 minutes or until hot. Serve over cous cous.

10.17.2012

Everything Must Go...

Something had to be done about the state of my freezer. It was getting totally out of control in there; nearly every conceivable iota of space had something jammed into it. There was no room for anything new, and with Christmas baking season only two months away, that was a serious problem. I was going to need room for a butter stockpile, as well as Ziploc bags of unbaked cookie dough, ready to be pulled out and baked off when the time came. As a result, it was time to set aside my recent meatless/meat-lite dining agenda, and set about the work of clearing out our overstocked freezer.

The first item to fall into the cross-hairs of my freezer search-and-destroy mission was a roughly five pound bag of very bulky beef short ribs. I had bought them early in the summer, when my grocery store was running a rare sale on beef in which you got five dollars back for every twenty you spent. I stocked up on flank steak, the star ingredient in our beloved beef and snow peas dish, but I also bought enough short ribs to make a beef pot pie recipe that I had spotted in an issue of Martha Stewart Living at my mother's house.

I knew I liked short ribs, and the idea of combining them with beer, garlic, and rosemary with a potato crust was infinitely appealing to me. However, I also knew that I didn't want to spend the better part of a day slaving over the stove and running the oven in the dead of summer, so I stashed the short ribs in the freezer and waited for the inevitable return of cooler weather.

Now that we've reached the chilly days of mid-October and I have plenty of time on my hands to tackle ambitious recipes, there was only one obstacle standing in my way -- with roughly five pounds of meat, I knew that Martha's pot pie recipe was going to make more food than two people needed to eat. So I invited over my friend Jess for dinner and a movie; after all, they say that three's a crowd.

I got off to a bad start with this recipe, as I manged to set off the smoke alarm in my apartment while browning my way through all five pounds of beef in my poorly ventilated kitchen workspace. I had long suspected that this would eventually happen to me, as my apartment regularly fills up with smoke while cooking, but that did not make it any less frustrating to have to scurry around mid-recipe to open windows and turn on fans to silence the piercing sound of the alarm. Thankfully, it was the middle of the day, so nobody else was around to hear it and call 911 on my behalf. 

After I got everything into the oven, however, I could tell that the hassle, and all the labor was going to pay off as a heavenly aroma began to waft through the air. And I was right, the beef emerged incomparably tender, swimming in a rich, unctuous stew perfumed with the heady scents of rosemary, onion, and garlic. The only thing that didn't work for me was the thing that had attracted me to the recipe in the first place -- the unusual potato crust.

To me, the delicately-arranged layers of thinly-sliced potato were not substantial enough to hold up to the hearty filling that lay beneath. I found myself thinking of my favorite mashed potato recipe from Alton Brown, and how well I thought that its savory, garlic-infused flavor would pair beautifully with Martha's stew. It seemed like it ought to be a match made in culinary heaven.

Given the price of beef these days, and our current financial circumstances, I suspect it will be a long while before I get to test my theory. Still, this beef filling has too much potential to give up on it now. I will definitely be giving my modified recipe a shot some day. Besides, if the deliciousness that ensued when I rescued those short ribs from freezer purgatory is any indicator, good things do come to those who wait.


Braised Short Rib and Stout Cottage Pie
adapted from Martha Stewart and Alton Brown

For filling:
5 pounds bone-in short ribs, cut into 2-inch pieces
Coarse salt and freshly ground pepper
1/3 cup all-purpose flour
3 tablespoons safflower oil
2.5 onions, halved and thinly sliced, divided
5 garlic cloves, thinly sliced
2 (12 oz.) bottles stout, preferably Guinness (3 cups)
2 rosemary sprigs

For topping:
1 recipe Alton Brown's Creamy Garlic Mashed Potatoes

Make the filling: 
Preheat oven to 300 degrees. 
1. Season short ribs with salt and pepper. Dredge short ribs in flour, coating all sides. Transfer to a large plate. Heat oil in a large Dutch oven over high heat. Working in batches, brown short ribs, about 1 minute per side. Transfer to a large plate using kitchen tongs.
2. Reduce heat to medium. Add one sliced onion to Dutch oven, and cook until golden, about 8 minutes. Add garlic. Cook for 2 minutes. Return meat to Dutch oven. Add stout and rosemary. Bring to a simmer. Cover, and transfer to oven. Bake for 2 1/2 hours.
3.  Remove Dutch oven from oven, and add remaining onions. Braise until meat is tender and onions are cooked through, about 30 minutes. Remove bones and shred meat using two forks. Season with salt and pepper. Transfer filling to a 12-inch (8-cup) gratin dish.
4. Raise oven temperature to 375 degrees. Spread, or pipe mashed potatoes onto the top of the beef filling. Bake until topping is golden and filling is bubbling, about 1 hour.

10.16.2012

I'm Just Mad About Saffron...

In uncertain times, it can be a tremendous source of comfort to continue with life as usual. Though I don't know what I'll be doing come Christmas, I decided it was nevertheless time to start testing cookie recipes for my annual Cookie Bonanza. I have no way of knowing whether I'll have coworkers once again to give them to, or if I'll have to devise a distribution system for giving them solely to friends, but I've done my annual cookie giveaway for each of the past four years, and I didn't want to give up on it now, just because I'm currently out of work.

The only problem is that now, four years into my quest to find the best cookie recipes, I've gotten a little bit jaded. There isn't much terrain left for me to explore, besides in categories that I don't particularly care to delve into. I've never made macaroons, for example, but I hate coconut. Though I have piles of books devoted to cookies, and frequently skim baking websites, it's become increasingly rare that I find any recipes that inspire me.

I did recently come across one such recipe on 101 Cookbooks, a blog that I enjoy reading but seldom cook from, and it went straight to the front of my baking queue. I had to wait a bit, since its non-traditional flavors didn't really seem appropriate to the first baking occasion that arose -- the shiva for Lisa's grandfather. I thought that cookies flavored with saffron and redolent of vanilla might be a little challenging for people in mourning, so I went with the pumpkin chocolate chip bars instead. But with a guest coming over for dinner, it seemed a perfect opportunity to give them a chance.

Though the recipe called them Saffron Vanilla Bean Snickerdoodles, the only thing that the finished cookies have in common with their namesake is their texture. They are soft and a little bit chewy in the center, but they have no cinnamon, the ingredient that I consider to be the defining characteristic of snickerdoodles. That said, despite not being a snickerdoodle in the traditional sense, I rather liked these cookies. The vanilla flavor was pronounced and intense, with beautiful flecks of the real seeds running throughout. The saffron, aside from contributing a glorious yellow color, contributed a compelling earthy aftertaste.

However, I'm afraid that I was the only person who felt that way. While Justin seemed to enjoy them, as did Jess, our dinner guest, the cookies I sent home with her to take to my other former coworkers seemed to go over rather less well according to Jess's report. Though their softness and texture were praised, most people seemed to find the saffron off-putting in a sweet context. I may be a big fan of saffron (enough so that I actually keep the rare spice in my cupboard at all times), but apparently others don't feel the same.

Given how expensive saffron is, not to mention the expense associated with acquiring whole vanilla beans, I'm not sure the recipe would be worth recreating it for the Cookie Bonanza. These cookies may have captured my imagination, and I had hoped they could bring an aura of luxury to my yearly giveaway, but it looks like I'm going to have to keep my eyes peeled for further inspiration this year.


Saffron-Vanilla Bean Snickerdoodles
adapted from 101 Cookbooks

about 30 strands of saffron, to make approximately 1/8 teaspoon ground
1/2 vanilla bean
2 tablespoons milk
2 c. all-purpose flour
1 teaspoon baking soda
1/2 c. unsalted butter
1/2 c. white sugar
1/2 c. brown sugar, packed
3/4 teaspoon salt
1 egg
1/2 teaspoon vanilla extract

1. Finely mince the saffron. The finer the powder, the more intense the saffron color and flavor in the cookies.
2. Combine the vanilla pulp, pod, milk, and saffron in a small microwavable bowl, and microwave just until the milk is hot, 20 to 30 seconds. Cover and let steep for about 10 minutes; the milk should have a sunny yellow color.
3. Sift the flour and baking soda into a medium bowl.
4. In the bowl of a stand mixer fitted with the paddle attachment, beat the butter on low speed until smooth, 1 to 2 minutes. Add the granulated sugar, brown sugar, and salt and mix on low speed until well combined. Scrape down the sides of the bowl, then mix on medium speed until light and fluffy, 4 to 5 minutes.
5. Remove the vanilla pod from the milk, squeezing off any liquid or pulp clinging to it back into the milk. In a medium bowl, combine the milk mixture, egg, and vanilla extract and whisk vigorously until well blended. With the mixer on medium speed, add the egg mixture very slowly, in a steady stream, and mix until well-incorporated and very smooth, about 30 seconds. Scrape down the sides of the bowl, then mix on medium speed for 30 more seconds.Scrape down the sides of the bowl, then add the flour mixture. Mix on low speed just until uniform in texture.
6. Using a rubber spatula, scrape the dough out into an airtight container or onto a piece of plastic wrap. Cover the container, or, if using plastic wrap, shape the dough into a rough disk, wrap tightly, and refrigerate for at least 3 hours and up to 5 days.
7. Preheat the oven to 350. Line a baking sheet with parchment paper or a silicone mat.
8. Roll dough into balls, and place them on the baking sheet, spacing them at least 2 inches apart. Bake for about 16 minutes, until golden but not too dark, rotating the pan midway through the baking time. Ideally, the baked cookies will be tall and slightly undercooked in the center, and will buckle shortly after coming out of the oven. If the cookies don't buckle, don't worry; they'll still be delicious. 9. Let the cookies cool on the pan for 10 minutes before removing. These cookies are best when eaten warm, shortly after they come out of the oven. However, they can be stored in an airtight container at room temperature for up to 2 days. Alternatively, the dough can stored in an airtight container in the refrigerator for up to 5 days, so consider baking only as many cookies as needed and saving the rest of the dough to bake another day.

10.14.2012

Behind the Scenes...

Justin and I aren't exactly a conventional couple -- not only did we spent our most recent Valentine's Day touring a cemetery in New Orleans and eating muffulettas in bed, but we spent virtually the entire weekend of our anniversary trekking around Chicago to visit historic churches and architectural gems as part of Open House Chicago. It may not be everyone's idea of a good time, but we got to spend two whole days together discovering the amazing secrets that our city holds behind closed doors, and for us, it was a perfect way to spend the weekend.

Last year, when I first heard about Open House Chicago, I was not as enthusiastic as I should have been. My mom had seen it either on television or in the paper, and she suggested I go. Justin and I pulled together a slapdash itinerary largely as we walked through the Loop, though I did know that I wanted to see the Seventeenth Church of Christ, Scientist and the Methodist Chicago Temple building as part of my ongoing series on Chicago ecclesiastic architecture. We ended up having some incredible experiences that day, including learning about the escape tunnels built into the Tribune Tower so that editors could escape a strike from the city's crime lords during the 1920s and standing on the floor of the Council chambers at City Hall. After that day, I vowed that if Open House Chicago was held again, I would do more to maximize my time.

Starting a month or so ago, I hit the Open House Chicago website to check out which buildings would be participating this year. This year, I wanted to cover a much wider geographic area, so I made all my choices in conjunction with Google Maps, to generate an itinerary that allowed me to fit in as many of the sites I was interested in seeing as possible. Again, this year I wanted to focus on churches and synagogues, since I've been terrible this year about continuing my church project, but I also had a few other objectives:
  1. Explore our new neighborhood.
  2. See the Driehaus Museum, a renovated historic house that normally has a $20 admission fee, but that was going to be free during the weekend of Open House Chicago.
  3. Visit my former coworker, Jessica Harvey, at her studio (she's also an artist), which was going to be open for the weekend.
Because I thought it was important to get a better appreciation for our new environs, I had to make the difficult decision of skipping locations on the city's south side. There are some fantastic churches to be see down there, with a rich history in the African-American community, and they've been languishing on my to-do list for years, but all of the buildings that were open last year were open this year. I'm hoping that the same will be true next year, so that we'll be able to focus on exploring that area, now that we've seen so much of the north and west sides this year.

Over the course of two days, we managed to see twelve different buildings, which may not seem like a lot, but when you plot them on a map and see the distance between them, along with factoring in time for meals, and I think we did fairly well.


View Open House Chicago 2012 in a larger map

I'm going to give the six religious sites we visited proper posts of their own, but for now, let me talk a bit about the other buildings we visited during the weekend:

We started our Sunday bright and early at the Driehaus Museum. We had tried to go on Saturday afternoon, but we were delayed in arriving due to a last minute visit to Justin's uncle who has been hospitalized at Northwestern with a aggressive brain tumor. By the time we arrived, the line wrapped around the corner and down the block, and we were the first people to be turned away since we wouldn't make it into the building before it closed. Newly aware of how popular the site was, we resolved to return early the next day.


Our plan worked perfectly, and we were able to walk right in with no wait. At first, it wasn't even especially crowded, though the longer we were there, the busier it became. By the time we left, the line was back to wrapping around the block. We appeared to hit the museum at just the right time.


The Driehaus Museum consists of a historic house, built in the 1880s by the Nickersons, a family of wealthy Chicago socialites. Though the Nickerson's abode was not as grand or elaborate as the Glessner House or the Palmer Mansion, it actually cost more to build, as Mr.  Nickerson's first mansion had burned down during the Great Chicago Fire, and he insisted on the latest in fireproof construction for his new dwelling. Though wood was used as a decorative element in the interiors, the structural elements of the home were built of stone and other non-combustible materials. Furthermore, the house is clad in so much marble that it became locally known as the "marble palace."


The home was acquired about a decade ago by wealthy Chicago hedge fund manager and philanthropist Richard Driehaus, who restored the building to its original glory with the intent of turning it into a museum to house his extensive collection of stained glass, antique furniture, and objets d'art. Though his collection was indeed formidable, I actually found the single most impressive aspect of the home to be the stunning stained glass dome located in the "gallery," a room where the original homeowners had displayed their own art collection.


To me, it seemed like there actually wasn't much on display at the Driehaus Museum, aside from a few nicknacks and some furniture. It was worth seeing for the incredible stained glass that was original to the house, but I was glad I hadn't paid $20 for the privilege. While we were there, I overheard a volunteer describing an upcoming exhibit featuring Driehaus' extensive collection of Tiffany glass, which might be worth paying to see, but I can't say that I'd recommend the Driehaus Museum with it's current installation.

Later in the day, we stopped by the Albany-Carroll Arts Building, where my friend Jessica has her studio space. We got to see some of her photographs taken in Iceland earlier this year while she was there on a Fulbright Scholarship, and meet her studio-mate. We had a lovely visit with them, before pressing on with our afternoon.


Across the street from Jessica's studio was the Egyptian Lacquer Manufacturing Company Building, also part of Open House Chicago, so we ducked in for a quick look. The building was constructed in 1926, in the wake of Howard Carter's discovery of King Tutankhamun's tomb, when all things Egyptian became seriously trendy. Today, the building houses artists' studios (it would seem that Garfield Park is the hot, up-and-coming arts district, due to all the large, former industrial spaces and cheap rents), and we got to meet the eccentric owner of the edifice. 

The interior was not especially notable, aside from the thickness of the walls, which were designed to help contain explosions, given the volatile nature of the chemicals used in lacquer production. Similarly, the ceilings were constructed from wood, so that any potential fires would burn up and out through the roof, instead of spreading from room to room, where they would meet more chemical accelerants.

After our brief visit, we found ourselves at a bit of a loss. There was still more time left in the day, so we wanted to squeeze in a few more locations, but most of what remained on my wish list was located on the south side of the city, and we were on the west side. By the time we got there, there wouldn't be time to see enough to make the journey worthwhile, so we decided to head for home. 


In the car, however, I remembered seeing a pair of Roger's Park apartment buildings in the Open House Chicago guide that were not especially far from our condo. Both were showcasing their unique indoor swimming pools; in fact, one of the buildings was deemed interesting enough to make the cover of the guide itself. We decided to make the pools our final stop of the day, and it turned out to be a fantastic decision.

The Park Castle Apartments and Park Gable Apartments actually ended up being Justin's favorite stops of the entire weekend. Though he's a good sport, he doesn't share my fondness for ecclesiastic architecture (my favorite stops for the weekend were the chapel at St. Scholastica Monastery, also in Roger's Park, and Our Lady of Sorrows Basilica on West Jackson), but the 1920s glamor of the buildings captured his fancy. They reminded him of a place where F. Scott Fitzgerald might have Gatsby take a swim.


I'm glad that I put so much more time and effort into planning our itinerary for Open House Chicago this year, and that we still had time leftover to do some spontaneous sight-seeing as well. I'm already looking forward to the places we'll get to see next year, but for now, I am very content with the special and unique locations that we got to experience in 2012. Chicago is truly a great city, with limitless secrets to unravel; I'm thankful that I had a chance to peak beneath the surface this weekend.

10.13.2012

To Sir, With Love...

Early October is a busy time for me and Justin, full of causes to celebrate. Within the span of six days, we mark not only Justin's birthday, but our anniversary. That's right -- as of today, Justin and I have been together for two years. 

I have been thinking a lot lately about the notion of time. For me, a woman who seriously doubted whether she would ever find love at all, two years feels like a long time. It feels like we have accomplished a lot in these two years: falling in love, having adventures, buying a home, learning how to live together, and fitting each other into the very fabric of our lives. And yet, what is two years compared to a lifetime spent together? When I compare these two years to the future that lies before us, they seem like barely any time at all.

Then again, recent events have reminded me that life does not always unfold as planned. We must savor every moment that we have together, and take nothing for granted. Justin and I have been so fortunate to have found one another, and to experience this kind of love. We have built a strong, vibrant life together, surrounded by friends and family. Even if two years seems insignificant compared to the forty or fifty I hope we'll have together, they are every bit worth celebrating.

I am so grateful for the past two years, and for Justin, who has filled my days with humor, support, and unwavering love. He is better to me than I probably deserve, and it is my goal for the next year to spend my time trying to give as much to him as he has given to me.

Happy anniversary, my love!

10.10.2012

A Grain of Truth...

I think it's official: we've gone crazy for quinoa. Now that I've made two successful dishes with the South American grain, I've begun to accept it as a regular fixture in our diet. It doesn't hurt that it's full of protein, since I've been trying to reduce the amount of meat in our diet, as per Justin's wishes. I'm not quite ready to serve up a pile of unadorned quinoa as a side dish, the way I would with brown rice, but I've certainly opened my mind to the culinary possibilities of this unique grain. 

The other day I even found myself clicking through a slideshow of quinoa recipes on Food and Wine's website, looking for new dishes to try. What caught my attention was a quinoa salad recipe from Ottolenghi, a legendary chain of delicatessens in the United Kingdom. Though I haven't had the opportunity to eat at one of their locations myself, the foodie blogosphere is rife with praise for their prepared foods, and 2010's Ottolenghi: The Cookbook was met with much fanfare. I figured it was high time to jump on the bandwagon myself.

I appreciated that this recipe combined quinoa with brown rice, not only because I adore the toothsome chewiness of brown rice, but because quinoa is really somewhat pricey, and anything I can do to make the box go farther is welcome in my book. It called for combining the grains with apricot and pistachio (both items that I knew would go over well with Justin), onion, garlic, and a tangy citrus vinaigrette. While the results were decent, I wasn't in love with the dish.

I really didn't care for the greens that were included in the original recipe. I felt like they were a distraction, and that the pieces of lettuce were too big relative to the other components, making it more difficult to eat. In the future, I would leave them out, and let it be a true grain salad. I also felt that the salad was a little dry after it soaked up the vinaigrette, and could have used just a bit more moisture to improve the mouth feel of the dish. 

Other than that, I enjoyed the salad, and think it would make either a lovely healthy side dish or a nice, light lunch. It would also be perfect for a picnic. I'm not sure I quite understand the cultish hype that surrounds Ottolenghi, but I'll concede that with a few tweaks, their recipe certainly has potential...


Rice and Quinoa Salad with Orange and Pistachios
adapted from Food and Wine

1 1/2 teaspoons grated orange zest
1 c. quinoa, cooked and cooled to room temperature
1 c. brown rice, cooked and cooled to room temperature
1/4 c. extra virgin olive oil
1 medium onion, thinly sliced
1/3 c. freshly-squeezed orange juice
1 tablespoon lemon juice
1 garlic clove, minced
1/2 c. dried apricots, cut into 1/3-inch dice
1/2 c. roasted pistachios, roughly chopped
4 green onions, thinly sliced

1. In a medium skillet, heat 1 tablespoon of the olive oil. Add the onion, season with salt and pepper. Cover and cook over moderate heat, stirring occasionally, until golden brown, about 10 minutes. Let cool.
2. In a large bowl, combine the orange juice, orange zest, lemon juice, garlic and the remaining 3 tablespoons of olive oil; season with salt and pepper. Add the quinoa, rice, onion, apricots, pistachios and scallions and toss well.

10.09.2012

Ain't No Challah Back Girl...

Growing up in a predominately Jewish community, one of the special joys of my young life occurred whenever a Jewish holiday would roll around and we would get out of school. Not being Jewish myself, I didn't have any obligation to go to synagogue or otherwise mark the occasion, so I would basically get a free day off of school to do whatever struck my (or my mother's) fancy. It was awesome.

Now that I'm unemployed, I have discovered an unexpected advantage to the arrival of some of the more obscure holidays: my best friend, Lisa, who works at a Jewish non-profit, gets the day off regardless of whether it's a holiday she actively celebrates. Today, she had the day off for Simchat Torah, a day for rejoicing of the Torah, the Jewish holy scriptures, so I proposed that she come over for a traditionally Jewish activity -- baking challah.

Challah is the bread traditionally eaten on the Sabbath in Judaism, and though I've never celebrated the Sabbath, I have eaten a lot of challah in my time, since they sell it at delis and regular grocery stores in my neighborhood. As a proud lover of all things carbohydrates, I've always had a special place in my heart for the eggy, soft, airy crumb of challah, with its slight hint of sweetness. Plus, it makes amazing French toast, another delicacy of which I am quite fond.


I've been contemplating a move into experimenting with bread-baking for some time now, and have tested the waters with cinnamon buns and various pizza doughs, but I had never worked up the nerve to try an actual loaf of bread. I'd also been wanting to embark upon a kitchen project with Lisa, ever since we failed yet again to make a hamantaschen date around the time of Purim. To keep the theme of Jewish baked goods, I settled upon challah as an excuse to get together, and Lisa readily agreed.

In the search for a good challah recipe, I checked out several books on bread baking and kosher cookery from the library, and ultimately decided to go with a recipe from Rose Levy Beranbaum, the same author who provided the labor-intensive, but flawless recipe for Justin's birthday cake last year. I should have known better, given that that cake took me four days to make, but Beranbaum's endlessly anal-retentive and precise instructions gave me comfort in embarking upon a new kitchen journey.

Her recipe called for making a sponge the night before, a step also known as pre-fermentation, which adds flavor to the dough and improves its texture. I awoke to find it alive and well, though its consistency had been much altered from the night before, when it had been thick, like pancake batter. Now it was runny and watery with a thick head of yeasty foam, which proved problematic, as I had intended to divide my sponge into two containers because I had made a double batch, knowing that Lisa would want to take home a loaf of her own. 

I knew there was no way of dividing the thin liquid at this point, since I did not know the individual weight of the bowl that contained it, so I had to pour the whole thing into a larger bowl that would accommodate the addition of a double batch of flour. I was terrified that that the bread would be a dud, since I had disturbed the sponge so greatly, but it turned out to be of little importance.

A four-strand braid would have been more traditional, but nearly 24 hours into this project, I didn't have the energy to figure out how to do one. They looked beautiful anyway.
As soon as Lisa arrived, a full day of bread baking commenced. Though Lisa was convinced that no real Jewish people dedicate this kind of time and effort to making challah, I was dedicated to following Beranbaum's instructions to the letter (excluding the problem with the sponge.) We were kneading, resting, proofing, flattening, relaxing, shaping, glazing, and baking the dough until nearly nine o'clock in the evening. Lisa is probably right, but the challah that emerged from my oven is some of the best I've ever eaten.


It's a good thing that it turned out so well, because we ended up with an enormous bread bounty. Each challah that we baked was the size of an infant. We easily could have made one batch of dough and created mini-challahs for both of us, and it would have been plenty. I definitely foresee French toast in our future, and Lisa plans on taking some of hers to the office to impress her coworkers. 

All things considered, I'm not sure whether this foray into bread making has intrigued me further, or scared me away. There were other tempting recipes in Beranbaum's hefty tone that caught my eye, but I'm not sure I'm ready to devote another day of my life to one of them any time soon. There is, after all, plenty of delicious bread available in the bakery section of my local mega-mart without the investment of extensive time and ingredient resources. 

Still, I'm glad that I tried my hand at bread baking, and even more glad that I got to spend an entire day with my best friend to do it. It's rare for us to get this kind of quality time, and I will relish it whenever I can.

10.07.2012

Happy Birthday To Justin...

For months now, I have been planning for a very special occasion. You see, a certain gentleman of my acquaintance is celebrating a milestone birthday, and I was keen to celebrate with a cake befitting the occasion. That's right: Justin turned thirty today!

I've been pestering him for months, asking him what kind of cake he wanted. I offered to recreate last year's epic white chocolate and lemon masterpiece; now that I'm unemployed, I could have surely done it in under four days since I'd have daylight hours to work on it as well as evenings. Though he loved that cake, he knows me well enough to know that I don't relish the thought of repeating recipes, and that I'm always on the lookout for excuses to try something new.

I suggested a number of flavor combinations and recipes to him, and all were met with an overwhelming ambivalence. Finally, I suggested the mint chocolate grasshopper cake I had wanted to make for Mom's own milestone birthday back in June, that she rebuffed in favor of making healthier choices. Though he didn't initially seem any more enthusiastic about that idea, his ears perked up when I mentioned that the recipe came from Baked: New Frontiers In Baking, the book that he got me for Valentine's Day in 2011. I've only ever made two recipes from it, and Justin seemed pleased that it would get some additional use in honor of his big day.

Still, I could sense that his acquiescence to the grasshopper cake was less about a craving for chocolate and mint and more about his desire to give me a chance to bake the cake I've been eying for months. As luck would have it, I found myself skimming through a pile of baking books from the library last week that included the sequel to the original Baked -- Baked Explorations: Classic American Desserts Reinvented. I tossed out a few ideas from the book to Justin in lieu of the grasshopper cake, but when I flipped to the last recipe of the cake section, I knew my quest was over. Though it was called "Aunt Sassy Cake," when I described the cake to Justin as a pistachio cake with honey vanilla buttercream, garnished with more pistachios, I received the most exuberant endorsement from him that I had heard in months. My quest was over.


Though this year's cake recipe was less complex than last year, it still featured a few unique points that kept me on my toes. The cake itself, for example, had an unusual batter that called for adding the dry ingredients alternating with ice water, followed by folding in whipped egg whites at the end, for lightness. And the frosting was unlike anything I'd ever seen before. Instead of a traditional buttercream, which involves sugar syrups and whipped egg whites, or so-called buttercream "cheats" that involve little more than powdered sugar and butter, this one called for boiling a mixture of flour, sugar, and milk, allowing it to cool, and then whipping it with the butter, honey, and vanilla. 

I was skeptical that anything that began life as a flour and milk paste would taste good, but the frosting was actually better than many I have made. It was the perfect consistency for spreading; neither too stiff or too runny, and it was slightly less sugary-tasting than most frostings, which I appreciated. Excessive sweetness is one of the primary reasons why I've always been vehemently anti-frosting, so this unconventional recipe from Baked might just be making another appearance in my kitchen someday.


Pistachios have always ranked near the bottom of my nut preference hierarchy, so this cake was truly a labor of love for Justin. I'll admit, they did add a nice buttery quality to the cake, but it was hard for me to love the finished product, given the extremely prominent pistachio flavor. The cake miraculously managed to be both exceptionally light and fluffy and moist, a combination that can be rare in homemade cake, which tend to be more on the dense and coarse side. The frosting, while perfect in texture and not too sweet, did not especially taste like honey, which I hoped would be more assertive, as I thought it would pair well with the pistachios.

I know, there's only half a cake here, but we celebrated Justin's birthday a few different times, with different sets of people, in order to get rid of enough cake that we wouldn't be eating it all ourselves.
Let it be said that Justin loved this cake, and since I made it as a physical manifestation of my love for him, his opinion is the only one that really matters. Everyone I fed the cake to loved it as well, but then again, they were also uniformly pistachio lovers across the board. As for me, I thought there were good things about the cake, such as the texture, the moistness, and the well-balanced frosting. I also may have hit upon the solution for my spotty cake decorating skills -- covering the sides of the cake with nuts to camouflage my sloppy frosting job. I'm going to have to remember that for the future.

For me, however, this cake will always live in the shadow of last year's luxurious lemon creation. I don't especially like lemon either, but that cake won me over. Perhaps I set the bar too high during my and Justin's first year together, and I'll always feel like I'm not doing enough compared to that unrealistically high standard. Maybe I'm expecting too much of myself; after all, Justin was thrilled with this year's cake, and that ought to be enough. Still, I'm not going to stop searching for the perfect cake for my perfect guy -- he deserves it!

Happy 30th birthday babe!